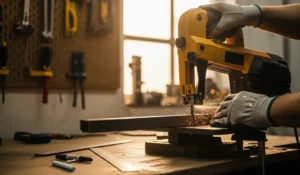
There is nothing-and I mean nothing-more frustrating in the shop than lining up a perfect resaw on a beautiful piece of cherry, starting your cut, and watching the blade decide to go on a walking tour to the left. You push harder, trying to steer the wood back to the line, but the blade just bows and twists further. By the time you’re done, you’ve got a board that looks like a Pringles chip and a barrel-shaped cut that’s going to take an hour to plane flat.
I’ve been there. Every woodworker has.
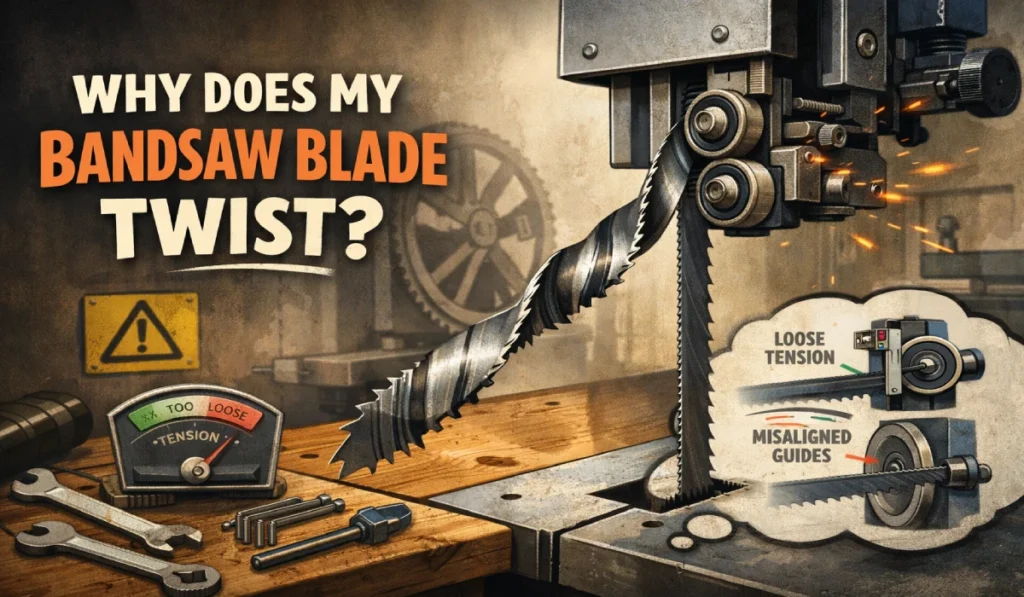
The bandsaw is arguably the most versatile machine in the shop, but it’s also the finickiest. Unlike a table saw, which is rigid and angry, a bandsaw is flexible. It relies on a delicate balance of tension, tracking, and guide support. When one of those variables is off, the blade twists (often called “drift” or “deflection”).
If you are asking, “Why does my bandsaw blade twist?” you are in the right place. We are going to break down the mechanics, the myths, and the fix-it-now solutions to get that blade cutting dead straight again.
1. The Number One Culprit: Lack of Tension
If I had to bet my favorite chisel on why your blade is twisting, I’d put my money on tension.
Most factory gauges on the back of bandsaws are inaccurate. They are essentially rough estimates based on a spring that wears out over time. If you dial the gauge to “1/2 inch” for a 1/2-inch blade, you are likely under-tensioning that blade by a significant margin.
Why Low Tension Causes Twist
Think of the blade as a guitar string. If it’s loose, you can push it side-to-side easily. If it’s tight, it resists that side pressure. When you push a piece of wood into a loose blade, the resistance of the wood pushes the blade sideways. Since the blade is a ribbon of steel, it doesn’t just move left or right; it twists.
Once the blade twists, the teeth are no longer pointing in a straight line. They are pointing diagonally. Naturally, the cut follows the teeth, and your blade wanders off into the sunset.
The Fix: The Flutter Test
Forget the built-in gauge. The most practical way to tension a blade without buying expensive tension meters is the “Flutter Method.”
- Raise the upper guide post all the way up.
- Turn the saw on.
- While the saw is running, slowly decrease the tension until you see the blade start to vibrate or “flutter” violently side-to-side.
- Now, slowly increase the tension just until that flutter disappears and the blade runs smooth and steady.
- From that point, give the tension wheel another quarter to half turn.
This puts the blade in the “sweet spot” for its specific length and steel composition.
2. Dull or Damaged Teeth (The Uneven Set)
A sharp blade cuts; a dull blade plows. But it’s not just about general dullness—it’s about uneven dullness.
A bandsaw blade has “set.” The teeth are bent alternating left and right to create a kerf (slot) wider than the blade body. This clearance allows the back of the blade to pass through the wood without friction.
The “Nail” Scenario
Let’s say you were cutting some reclaimed lumber and grazed a hidden nail on the left side of the blade. The teeth on the left are now dull, while the teeth on the right are still sharp.
- The sharp teeth on the right will cut efficiently.
- The dull teeth on the left will resist the wood.
Physics takes over: the blade will pull hard toward the side with the sharp teeth (the right), causing a severe twist that no amount of guide adjustment can fix.
The Fix
Inspect your teeth. If they look shiny or rounded over, or if you know you hit something hard, toss the blade. Bandsaw blades are consumables. Don’t ruin $50 worth of wood trying to save a $25 blade.
3. Guide Bearings and Cool Blocks: The Safety Rails
There is a misconception that the guides (the bearings or blocks on the side of the blade) keep the blade straight. They do not.
The tension keeps the blade straight. The guides are just there to limit deflection when you put load on the saw. However, if they are set up wrong, they can actively cause twisting.
The Problem: Guides Too Tight
If your side guides are pinching the blade, they will heat it up due to friction. Heat causes metal to expand. A hot, expanded blade loses tension immediately. (See point #1). Suddenly, your perfectly tensioned blade is floppy, and it starts to twist.
The Problem: Guides Too Far Forward
If your side guides are pushed too far forward, they might hit the teeth. This ruins the “set” of the teeth (see point #2) and ruins the blade instantly.
The Fix: The Dollar Bill Trick
When setting your side guides (whether they are ball bearings or ceramic/cool blocks):
- Bring the guide close to the blade.
- Slip a crisp dollar bill (or a piece of standard printer paper) between the blade and the guide.
- Tighten the guide so it lightly touches the paper, then pull the paper out.
- This leaves a gap of about 0.003 to 0.004 inches.
This gap ensures the guides don’t touch the blade while it’s idling, but they engage immediately once you start pushing wood.
4. You’re Using the Wrong Blade for the Job
I see this all the time. A woodworker tries to resaw a 6-inch wide walnut board using a 1/4-inch, 6 TPI (Teeth Per Inch) scrolling blade.
Why This Causes Twist
- Beam Strength: A 1/4-inch blade has very little “beam strength” (front-to-back stiffness). It wants to buckle under the pressure of a heavy cut.
- Gullet Capacity: A blade with high TPI (like 10 or 14) has small gullets (the valley between teeth). When cutting thick wood, those gullets fill up with sawdust instantly. If the dust can’t escape, it packs tight against the wood and wedges the blade, forcing it to twist to find a path of least resistance.
The Fix
Match the blade to the task.
- Curves: 1/8″ to 3/8″ blades.
- General Purpose: 1/2″ blade (usually 3 or 4 TPI).
- Resawing/Straight Cuts: 1/2″ to 3/4″ (or wider if your saw allows) with low TPI (2 or 3). You need deep gullets to clear that dust.
5. Feed Rate and Hand Pressure
Sometimes, the problem isn’t the machine. It’s the operator. (I know, it hurts to hear).
When we get impatient, we push the wood harder. We try to force the feed rate.
- Forcing the Cut: Pushing the wood faster than the teeth can clear the material puts massive backward pressure on the blade. The blade will bow backward, and once it bows backward, it inevitably twists sideways.
- Steering the Cut: If you are cutting against a fence and you notice the cut drifting, your instinct is to twist the wood to get back on line. This puts torque on the blade body.
The Fix
Listen to the saw. The motor shouldn’t bog down significantly. You should feel the teeth cutting, but you shouldn’t have to use your body weight to push the wood. Let the tool do the work. If you have to force it, the blade is dull, or you need a coarser pitch.
6. The Fence Alignment (Drift)
Many woodworkers believe that bandsaw blades never cut parallel to the miter slot or the fence. This is the concept of “drift angle.”
If your fence is perfectly square to the table, but your blade naturally wants to track 2 degrees to the left, using the fence will force the blade to twist. You are forcing the wood straight, but the blade wants to go left. The blade twists to accommodate the fight.
The Fix
You have two options here:
- Tune the Tracking: Adjust the tracking wheel on the upper tire so the blade rides the crown (the center hump) of the tire perfectly. Often, getting the tracking dead-center eliminates drift.
- Adjust the Fence: If the blade still has a natural drift, take a scrap piece of wood. Draw a straight line. Freehand cut along that line until you are cutting straight. Stop the saw (hold the wood still!). Look at the angle of the wood. Adjust your fence to match that angle.
7. Check Your Tires
The rubber or urethane tires on your bandsaw wheels are critical. If they are old, cracked, or flattened, the blade won’t track consistently.
Most bandsaw wheels are crowned (slightly domed). This crown is what makes the blade self-center (physics is cool like that). If your tires are worn flat, the blade wanders across the wheel surface. If the blade moves on the wheel, the angle of attack changes, and the cut twists.
The Fix
Clean your tires. Pitch and sawdust buildup can create artificial bumps. If they are cracked or brittle, replace them. Urethane tires are a great upgrade over standard rubber because they don’t dry rot as fast.
8. Is Your Table Square?
This is a subtle one. If your bandsaw table is not 90 degrees to the side of the blade, gravity and pressure will cause the blade to wander.
The Fix
Grab a trusted square. Place it on the table and rest it against the body of the blade (not the teeth, as the set of the teeth will throw off the measurement). Adjust the table trunnions until it is dead square.
Troubleshooting Checklist: The “Quick Fix” Sequence
If you are standing in front of your saw right now and the blade is twisting, do this in order:
- Check Sharpness: Run your finger (carefully) lightly across the teeth. Do they grab your skin or slide? If they slide, change the blade.
- Crank the Tension: Give it more tension than you think it needs. Try the flutter test.
- Back Off the Guides: ensure they aren’t pinching the blade.
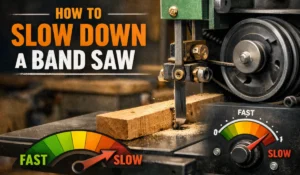
- Slow Down: Ease up on your feed pressure.
Conclusion
A bandsaw blade twisting is usually a cry for help. It’s telling you that it’s either too loose, too dull, or choking on sawdust. It is rarely a fatal flaw in the machine itself.
When a bandsaw is tuned—when that blade is tensioned high, the guides are set just right, and the teeth are sharp—it is a revelation. You can slice 1/16th-inch veneers off a 10-inch log with precision that rivals a planer.
Take the time to set it up. Stop fighting the drift, and start fixing the root cause. Your scrap bin (and your sanity) will thank you.
Frequently Asked Questions (FAQ)
1. Can I use a lubricant to stop my bandsaw blade from twisting?
Lubricant won’t stop twisting caused by tension or dullness, but it can help reduce friction and heat, which are contributing factors. A dedicated blade lubricant stick (wax-based) applied to the sides of the blade can help it run cooler. However, never use wet oil or grease, as it will gum up your tires and ruin the tracking.
2. How do I know if my bandsaw blade is too dull?
There are three main signs:
- You have to push the wood significantly harder than usual to get it to cut.
- The wood shows burn marks, or you smell burning wood.
- The blade wanders or twists despite having proper tension. If you see these, it’s time to change the blade.
3. Is it better to have the blade run in the center of the wheel or the front?
For crowned tires (which most saws have), the blade should run in the dead center of the upper wheel. This aligns the blade with the apex of the crown, providing the most stability. For flat tires (rare, usually on huge industrial saws), the teeth often hang slightly off the front edge to protect the tire.
4. Why does my blade twist only when cutting thick wood?
Thick wood requires more “beam strength” and gullet capacity. If you are using a thin blade (like 1/4″) or a fine-tooth blade (10+ TPI), the blade cannot clear the dust fast enough. The packed dust forces the blade sideways. Switch to a wider blade (1/2″ or larger) with fewer teeth (3 TPI) for thick stock.
5. Can I sharpen my own bandsaw blades?
Technically, yes, but for most standard blades (carbon steel), it isn’t worth the time. Hardened spring steel blades are cheap enough to replace. However, if you invest in a carbide-tipped blade (which costs $150+), you should absolutely send it out to a professional sharpening service when it gets dull.