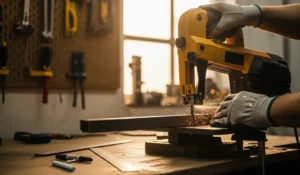
If there is one feeling every woodworker knows, it’s that moment of panic when a board stops sliding smoothly halfway through a cut. You’re pushing, the motor is humming, and suddenly you smell burning cherry or maple. That isn’t just annoying-it’s dangerous. Friction is the enemy of a safe table saw, and it is usually caused by a dirty, sticky, or rusted cast iron top.
I’ve been working in shops for over twenty years, from high-end cabinetry to rough framing, and I can tell you that the secret to accurate cuts isn’t always a more expensive blade. Often, it’s a $15 tin of paste wax.
Maintaining your cast iron surface is a rite of passage. It transforms a rough, rusty surface into something that feels like an air hockey table. In this guide, I’m going to walk you through exactly how to clean, wax, and maintain your table saw top. We’ll cover why paste wax is the gold standard, what products to avoid, and the step-by-step process I use in my own shop to keep my iron glass-smooth and rust-free.
Why Do You Need to Wax Your Table Saw?
Before we get the rags out, let’s talk about why we are doing this. A cast iron table saw top is porous. If you look at it under a microscope, it looks like a sponge. Those microscopic pores hold onto moisture, which leads to rust, and they create friction when raw wood slides across them.
1. Reducing Friction for Safety
When you feed a board through the saw, you want your energy to go into controlling the cut, not fighting the table. If the table is sticky, you have to push harder. When you push harder, your hands can slip, or you might lose track of your body mechanics. A waxed table allows the wood to glide effortlessly, giving you better control and significantly reducing the chance of binding or kickback.
2. Preventing Rust
If you live anywhere with humidity-whether it’s the muggy South or a damp garage in the Pacific Northwest-cast iron wants to rust. It’s inevitable. Rust creates a rough surface that stains your wood and ruins accuracy. Paste wax fills those pores in the iron and creates a barrier against oxygen and moisture. It is the cheapest, most effective insurance policy for your machinery.
3. Improving Accuracy
A sticky table causes jerky movements. You push, it sticks, you push harder, it jumps forward. That inconsistency shows up as burn marks on the edge of your board or saw marks that you’ll have to sand out later. A slick surface equals a smooth feed rate, which equals a cleaner cut.
The Golden Rule: No Silicone allowed!
This is the most critical advice in this entire article. Never use automotive wax or standard household lubricants on woodworking machinery.
Many car waxes and aerosol lubricants (like standard WD-40) contain silicone. Silicone is a nightmare for woodworkers. If even a microscopic amount of silicone gets onto your table saw top, it will transfer to your wood. When you later try to apply a finish-stain, polyurethane, lacquer, or varnish-that silicone will cause “fish eyes.” These are ugly little craters where the finish refuses to stick.
Always use a traditional floor paste wax that is silicone-free. Brands like Minwax, SC Johnson (if you can find it), or specific woodworking waxes like Butchers Wax are the industry standard. Check the label. If it mentions silicone, keep it away from the shop.
Tools and Materials You Will Need
You don’t need a lot of fancy gear to do this right. In fact, you probably have most of this under your kitchen sink or in the garage.
- Paste Wax: Ensure it is silicone-free.
- Mineral Spirits (Paint Thinner): Used for cleaning the old gunk and grease off the saw.
- Scotch-Brite Pads: I prefer the maroon (medium) or gray (fine) pads. Avoid steel wool if possible, as it sheds little metal fibers that can rust later, but 0000 steel wool works in a pinch.
- Clean Cotton Rags: Old t-shirts are perfect. You need some for applying and plenty for buffing.
- Orbital Sander (Optional): This speeds up the cleaning process but isn’t strictly necessary.
- Nitrile Gloves: Keep the chemicals off your skin.
Phase 1: Preparation and Deep Cleaning
You cannot wax a dirty table. If you apply wax over pitch, glue, or rust, you are just sealing the problem in. You need to strip the metal down to bare iron first.
Step 1: Safety and Tear Down
Unplug your table saw. I know, I know-you’ve heard it a million times. But we are going to be scrubbing right next to the blade. Unplug it. Lower the blade completely below the table surface. Remove the throat plate, the fence, and the miter gauge. You want a completely clear runway.
Step 2: Solvent Soak
Pour a generous amount of mineral spirits onto the cast iron. You don’t need to flood it, but get it wet. Let it sit for about 5 minutes. The solvent will break down the old wax, tree pitch (sap), and sawdust that has been mashed into the pores.
Step 3: The Scrub Down
Put on your gloves. Take your Scotch-Brite pad and start scrubbing. If you have a random orbit sander, you can stick the Scotch-Brite pad to the velcro base (it sticks surprisingly well) and use the machine to do the hard work.
Move in small circles, covering every square inch of the table. Pay special attention to the area right in front of the blade, as that is where pitch tends to accumulate from the wood. If you see brown slurry forming, that’s good-that’s the rust and dirt lifting off.
Step 4: Wipe and Dry
Take a clean rag (not your waxing rag) and wipe up the dirty solvent. The table should look significantly brighter now. If you still see dark gray patches or heavy rust spots, repeat the solvent and scrub process.
Once the table is clean, do one final wipe with a fresh rag dampened with mineral spirits to remove any lingering residue. Then, dry it completely with a dry towel. The cast iron should look matte gray and feel dry to the touch.
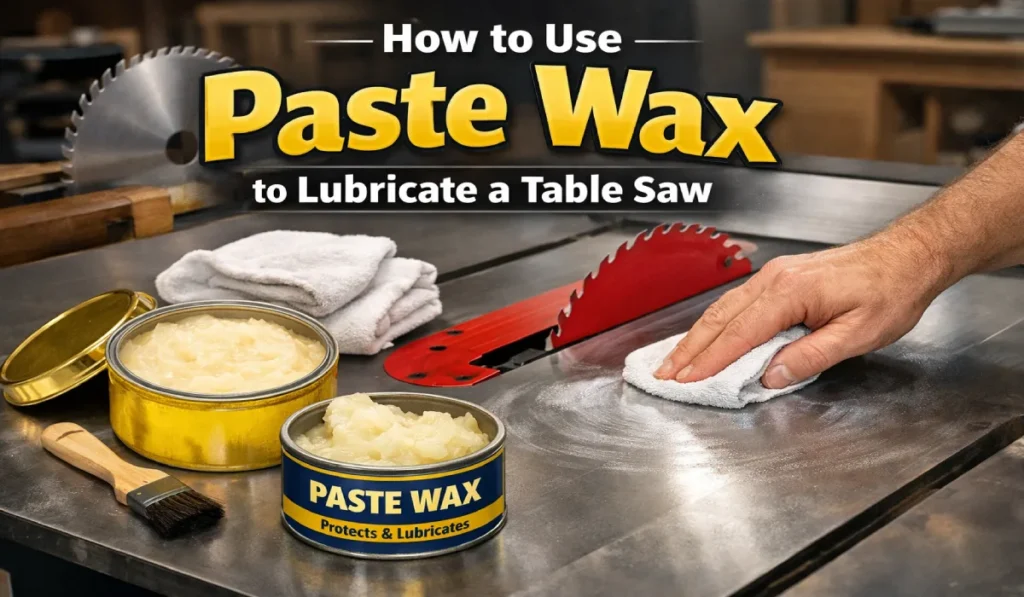
Phase 2: Applying the Paste Wax
Now comes the magic. The goal here isn’t to build up a thick cake of wax like you might on a surfboard. We want a thin, hard film.
Step 1: Loading the Rag
Take a clean, soft cotton rag. Fold it into a comfortable pad. Dip it into the tin of paste wax. You don’t need a giant glob; just get the cloth saturated.
Step 2: Application
Apply the wax to the cast iron table in a circular motion. Think of the “wax on” motion from The Karate Kid. You want to work the wax into the pores of the metal, not just smear it on top.
Ensure you cover the entire surface:
- The main table.
- The extension wings (even if they are stamped steel).
- The miter gauge slots (crucial for smooth crosscuts).
- The sides of the table where the fence rails mount (if applicable).
Don’t forget the rip fence itself! If your fence has plastic faces, check if they are compatible with solvents, but usually, a light coat of wax helps the wood glide against the fence, too.
Step 3: The Waiting Game (The Haze)
This is where people mess up. They wipe it off too soon. You need to let the wax dry until it forms a dull, cloudy haze. Depending on the temperature and humidity in your shop, this usually takes between 10 to 20 minutes.
If you wipe it while it’s still wet, you are just removing the wax you just applied. You need the solvents in the wax to evaporate so the wax hardens.
Phase 3: The Buff Out
Once the table looks dull and hazy, it’s time to buff.
Step 1: The Initial Wipe
Take a fresh, clean terry cloth or microfiber towel. Start wiping deeply. The first pass will feel a little sticky as you break the surface tension of the dried wax. You are removing the excess wax that sits on top of the metal, leaving behind the wax that is inside the pores.
Step 2: The High-Speed Buff
Once the bulk of the haze is gone, fold your towel to a clean side and buff vigorously. Use some elbow grease! You want to generate a little heat from the friction.
The surface should start to change. It will go from dull to a semi-gloss sheen. When you run the back of your hand across it, it should feel slippery and cool. There should be absolutely no greasy residue left on your fingers. If you can smudge it with your finger, you haven’t buffed enough.
How Often Should You Wax Your Table Saw?
This depends entirely on how much you use your shop.
- The Weekend Warrior: If you are in the shop every Saturday, plan on waxing your table saw every 3 to 4 months.
- The Professional: If you use the saw daily, I recommend a quick wax once a month.
- High Humidity Areas: If your shop is in a non-climate-controlled garage and it rains a lot, check your table weekly. If you spot the tiny orange bloom of rust, strip it and wax it immediately.
A good rule of thumb is the “slide test.” Place a piece of wood on the table and give it a gentle shove. If it glides halfway across the table, you are good. If it stops immediately or feels like it has brakes, it’s time to wax.
Troubleshooting Common Issues
“The wax is balling up when I buff it.”
You applied it too thick. Paste wax should be applied as thinly as possible. If you gooped it on, it will take forever to dry and will be a nightmare to buff off. Use mineral spirits to strip it and try again with a lighter hand.
“My wood is getting stained.”
You didn’t buff it enough, or you used a wax with a dark pigment. Ensure you are using a clear or “natural” colored paste wax. Also, ensure you buff until the surface is dry to the touch.
“I waxed it, but I still see black streaks on my wood.”
This is usually aluminum oxide or residual dirt. It means you didn’t clean the table well enough before waxing. The wax pulled the dirt out of the pores, and now it’s transferring to your wood. Clean the table thoroughly with mineral spirits and start over.
Beyond the Table Saw: Other Tools to Wax
Once you see the difference this makes on your table saw, you’re going to want to wax everything in the shop. And you should! This same process applies to:
- Jointer Beds: Essential for flattening boards. Friction here causes major headaches.
- Planer Beds: Helps the rollers feed the wood through without snipe.
- Band Saw Tables: Reduces friction for intricate curve cutting.
- Hand Tools: A light coat on the sole of your hand planes makes them shoot easier.
Frequently Asked Questions (FAQ)
1. Can I use car wax on my table saw?
No! Absolutely not. Most car waxes contain silicone. Silicone interferes with wood finishes (stains, poly, lacquer) and causes “fish eyes,” which are spots where the finish won’t stick. Always use a silicone-free paste wax designed for floors or furniture.
2. Is Johnson’s Paste Wax discontinued? What should I use instead?
Yes, sadly, SC Johnson discontinued their famous paste wax recently. However, excellent alternatives exist. Minwax Paste Finishing Wax is readily available and works perfectly. Butcher’s Bowling Alley Wax is another favorite among old-school woodworkers. Just ensure the label does not mention silicone.
3. Will the wax transfer to the wood and ruin my project?
Not if you apply and buff it correctly. The goal is to fill the metal’s pores, not leave a thick layer on top. If you buff the wax until the table feels dry and slick (not greasy), it will not transfer to your lumber or affect your gluing and finishing.
4. Can I use spray lubricants like T-9 Boeshield or GlideCote instead?
Yes, you can. Products like Boeshield T-9 or Bostik GlideCote are modern spray alternatives that work very well. They dry fast and offer great rust protection. However, many pros still prefer paste wax because it is significantly cheaper and offers a “slicker” feel that lasts longer during heavy use.
5. How do I remove heavy rust before waxing?
For light rust, the Scotch-Brite and mineral spirits method in this guide works fine. For heavy, pitted rust, you may need to use a penetrating oil (like WD-40, but clean it thoroughly afterward) and a razor blade scraper to knock down the high spots, followed by 400-grit wet/dry sandpaper on a sanding block. Once the rust is gone, clean with mineral spirits and immediately wax to seal the metal.
The Small Maintenance Habit That Changes Everything
Woodworking is a tactile trade. We rely on the feel of the material moving through the machine. When your table saw is properly waxed, the connection between you, the workpiece, and the blade becomes intuitive. You stop fighting the friction and start focusing on the craft.
It takes maybe 30 minutes to do this properly, and the tin of wax will last you a decade. It is the single highest ROI maintenance task you can perform in your shop. So, go unplug your saw, grab a rag, and give your machine the love it deserves. Your next project will thank you for it