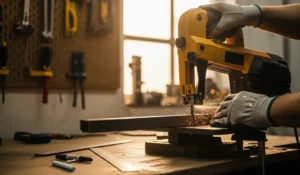
There is nothing-and I mean nothing-more frustrating on a jobsite than a miter saw that refuses to cut clean. You know the feeling: you pull the trigger, drop the head, and instead of slicing through that piece of hard maple like butter, you get smoke, a burning smell, and a cut that looks like a beaver chewed on it.
Most folks assume the blade is trash and head to the big box store to drop $60 or $80 on a new Diablo or Freud. But as a carpenter who’s been making sawdust for over 20 years, I can tell you that you’re likely throwing money away.
Sharpening a miter saw blade-specifically the carbide-tipped ones we all use today-is a skill that’s fading away, but it’s entirely possible to do at home with a little patience. In this guide, I’m going to walk you through how to tell if your blade is actually dull (spoiler: it might just be dirty), how to sharpen it yourself, and when it’s time to call in the pros.
The Anatomy of the Cut: Understanding Your Blade
Before we start grinding away metal, you need to understand what you are working with. If you look closely at your miter saw blade, you aren’t just looking at a steel disc.
The Plate vs. The Teeth
The large steel disc is the plate. On a quality blade, this is laser-cut and tensioned to stay flat. You can’t “sharpen” the plate. What we are focused on are the teeth.
On 99% of modern miter saw blades, these teeth are small chunks of C-3 or C-4 Micrograin Carbide brazed (welded) onto the steel shoulders. Carbide is incredibly hard-much harder than the steel files you might have in your toolbox. This is why you cannot use a standard mill file to sharpen a miter saw blade. It won’t scratch the surface. You need diamond.
The Geometry
Miter saw blades usually have a high tooth count (60, 80, or even 100 teeth) with a specific geometry, often ATB (Alternate Top Bevel) or Hi-ATB. This means the teeth are angled differently, alternating left and right to slice wood fibers cleanly. Maintaining these angles is crucial. If you file one tooth flat and the next one at 15 degrees, your saw will vibrate and cut poorly.
The “Pitch” Test (Is It Actually Dull?)
I would say about 50% of the “dull” blades I see in my shop aren’t dull at all. They are dirty.
When you cut resinous softwoods like pine or sap-heavy hardwoods like cherry, heat melts the pitch and sap. This goo bonds to the carbide teeth. As it cools, it hardens into a rock-solid coating that covers the sharp edge. This friction creates heat, which causes burning, which makes you think the blade is dull.
Before you sharpen, clean the blade.
- Remove the blade from the saw (unplug it first!).
- Soak it: Place the blade in a shallow pan (a customized kitty litter tray works great for 10-12 inch blades).
- Apply Cleaner: Spray it down liberally with a blade cleaner like Simple Green or a dedicated resin remover like Trend Tool Cleaner. Laundry detergent and water work in a pinch.
- Wait: Let it sit for 10-15 minutes.
- Scrub: Use a nylon or brass brush (never steel, it scratches the coating) to scrub the teeth. You will see the black gunk melt away to reveal the shiny carbide.
- Dry: Wipe it bone dry to prevent rust.
Reinstall it and make a test cut. If it cuts clean, you just saved yourself an hour of sharpening. If it’s still burning or tearing out grain, proceed to Step 1.
Tools You Need for DIY Sharpening
If cleaning didn’t solve it, you need to hone those edges. Since we are dealing with carbide, we need specific tools.
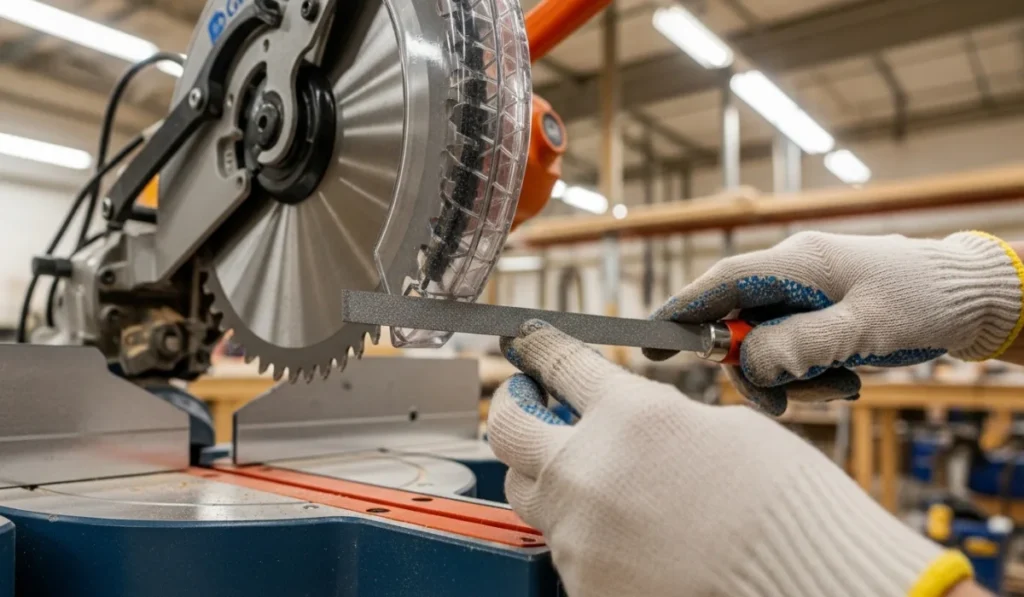
- Diamond Paddle File/Hone: You want a fine grit (approx. 600 grit). DMT makes excellent diamond whetstones for this. Do not use a standard metal file.
- A Secure Clamp: You need to hold the blade rock steady. A bench vise with wooden jaws (to protect the blade plate) is ideal.
- A Black Sharpie: Essential for tracking your progress.
- Good Lighting: You need to see the tiny facets of the carbide teeth.
- Safety Gear: Leather gloves are smart. Even a dull blade can slice your hand if you slip.
Step-by-Step: Sharpening Your Miter Saw Blade
Disclaimer: Hand-sharpening is best for “touch-ups.” If your blade has chipped teeth or is completely rounded over, it needs a professional CNC grind. Hand sharpening is about honing the edge back to life.
1. Secure the Blade
Mount the blade in your vise. You want the teeth facing up, with about a quarter of the blade exposed above the jaws. The blade should not wobble. If you don’t have a vise, clamp the blade flat to the edge of your workbench, letting the teeth hang slightly over the edge.
2. Mark Your Starting Point
Find the branding or logo on the blade plate. Mark the tooth directly above it with your Sharpie. This is your “Start/Stop” line. If you don’t do this, you will lose track and end up sharpening some teeth twice, which throws the blade out of balance.
3. Identify the Face
There are two parts of the tooth you could sharpen: the Top and the Face (the front part that hits the wood).
- The Pro Strategy: Only sharpen the Face.
- Why? The top usually has complex bevels (angles). Trying to match that ATB angle by hand is a nightmare. The face is usually flat and easier to register your file against. Filing the face removes material to expose a fresh, sharp edge at the top.
4. The Filing Technique
Take your diamond paddle. Lay it flat against the face of the first tooth.
- Match the Angle: The face isn’t always 90 degrees vertical; it might have a “hook angle.” You must align your file perfectly flush with the existing carbide face.
- The Stroke: Apply even pressure and push the file across the face of the tooth.
- Count Your Strokes: This is critical for balance. If you do 5 strokes on the first tooth, you must do 5 strokes on every tooth.
- Pressure: Don’t bear down with all your weight. Let the diamonds do the work.
5. Rotate and Repeat
After sharpening the exposed teeth, rotate the blade in the vise to expose the next section. Continue until you reach your Sharpie mark.
6. The Fingernail Test
Once you’ve gone all the way around, carefully drag the top edge of a tooth across your fingernail. A sharp blade will “catch” or bite into the nail with zero pressure. A dull blade will slide over it.
The Economics: DIY vs. Professional Sharpening Services

You might be wondering, “Is this worth my time?” That depends on the blade.
The “Disposable” Blades
If you are running a cheap $25 construction-grade blade (like the stock ones that come with the saw), it’s rarely worth paying to sharpen. However, these are great candidates for DIY practice. If you mess it up, you’re only out $25.
The High-End Blades
If you own a Forrest Woodworker II, a Freud Premier Fusion, or a high-end Makita blade ($80 – $150 range), do not sharpen these by hand unless you are very skilled.
These blades have massive carbide tips meant to be resharpened 10-15 times. However, they require precision. A professional sharpening service (often found at local woodworking supply stores like Rockler or Woodcraft) uses CNC machines to grind the teeth to within .001 of an inch.
- Cost to Pro Sharpen: Usually $0.25 to $0.50 per tooth. An 80-tooth blade costs about $20-$30 to sharpen professionally.
- The Verdict: For a $100 blade, spending $25 to make it “better than new” is a no-brainer.
Why Do Blades Get Dull? (And How to Prevent It)
Prevention is better than cure. If you want to sharpen less often, stop abusing your blades. Here are the three blade killers I see on the jobsite:
1. Heat Build-up
Heat kills carbide. When the blade gets hot, the metal expands and the microscopic edge degrades.
- The Fix: Stop forcing the cut. Let the saw eat. If you hear the motor bogging down, you are pushing too hard.
2. Using the Wrong Blade
Using an 80-tooth fine-finish blade to rip-cut pressure-treated 4x4s is suicide for the blade. The gullets (the gaps between teeth) are too small to clear that much sawdust. The dust packs in, creates friction, heats up, and ruins the temper of the blade.
- The Fix: Use a 24-tooth or 40-tooth blade for framing and rough lumber. Save the 80-tooth for trim and hardwoods.
3. Dirty Lumber
Silica (sand) in the wood, old paint, and hidden nails are instant death for a sharp edge.
- The Fix: Wire brush reclaimed lumber before cutting. And for the love of craftsmanship, buy a cheap metal detector wand to scan for nails in pallet wood.
Signs Your Blade is Beyond Saving
Sometimes, no amount of diamond filing will help. It’s time to retire the blade if:
- Missing Teeth: If you have hit a nail and popped a carbide tip off, the blade is dangerous. It’s unbalanced and can cause catastrophic failure. Throw it out.
- Burned Steel: If the steel plate itself has blue or black scorch marks, the metal has lost its tensioning. The blade will wobble and never cut straight again.
- To Much Sharpening: If the carbide tips are filed down to little nubs, there is no material left to hone.
Safety Warning: The Kickback Danger
I can’t finish this article without a serious safety note. A dull blade is dangerous. It requires more feed pressure to cut. The harder you push, the more likely the workpiece is to bind, climb, or kick back.
Sharpening your blade isn’t just about pretty cuts; it’s about keeping your fingers attached. A sharp tool is a safe tool.
Frequently Asked Questions (FAQ)
1. Can I use a regular file to sharpen my miter saw blade?
No. Regular files are made of hardened steel, but miter saw teeth are made of carbide. Carbide is harder than steel. If you use a steel file, it will just skate over the teeth and damage your file. You must use a diamond-coated file or paddle.
2. How many times can a miter saw blade be sharpened?
This depends on the quality of the blade and the size of the carbide tips. High-quality blades (like Forrest or Freud Industrial) have thick carbide that can be sharpened 10 to 15 times professionally. Cheaper “throwaway” blades may only have enough carbide for 1 or 2 sharpenings.
3. Is it worth sharpening cheap blades?
Generally, no. If a blade costs $20-$30 brand new, paying $20 to have it professionally sharpened doesn’t make sense. However, doing a quick 5-minute touch-up yourself with a diamond file can extend its life by a few jobs, which is definitely worth the effort.
4. Why does my blade burn the wood even after sharpening?
If the blade is sharp but still burns, check your alignment. The blade might not be parallel to the miter slot or fence. Alternatively, the blade might be warped (runout), or you might be using a blade with too many teeth for the thickness of the wood you are cutting.
5. How often should I clean my miter saw blade?
You should clean your blade whenever you see pitch (sticky brown or black resin) building up on the teeth. For heavy users, this might be once a week. Keeping the blade clean significantly reduces heat and extends the time between sharpenings.
Final Thoughts: The Secret to Smoother Cuts Starts Here
Learning how to sharpen miter saw blades-or at least knowing how to clean and maintain them-separates the weekend warriors from the craftsmen. It forces you to slow down, look at your tools, and understand how they work.
Start with a good cleaning. You’ll be shocked at how much that helps. If that fails, grab a diamond file and give the faces a light hone. And if you’re rocking a high-dollar blade, support your local sharpening shop. Your miter saw will thank you, and so will your wallet.