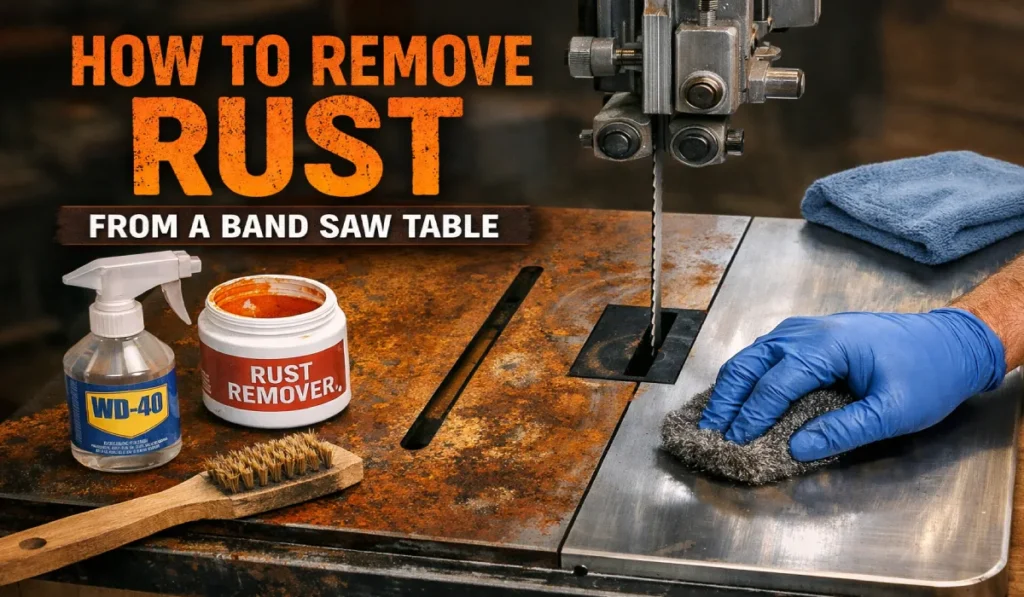
There is a specific feeling of dread that every woodworker knows. You walk into the shop on a Monday morning, coffee in hand, ready to start resawing some walnut, and you see it. That dull, orange haze sitting on top of your beautiful cast iron band saw table.
Maybe you left the garage door open during a rainstorm, or maybe the humidity just spiked over the weekend. Heck, maybe you made the rookie mistake of leaving a sweaty cold drink on the metal (we’ve all been there).
Rust isn’t just ugly. On a band saw, it’s a performance killer. A rusty table creates friction, making it harder to feed stock smoothly. It can stain expensive lumber, and if left unchecked, it can pit the surface, ruining the flatness you need for precision joinery.
I’ve restored everything from vintage Deltas found in barns to modern Powermatics that just had a bad week. In this guide, I’m going to walk you through exactly how to remove rust from your band saw table, restore that factory shine, and—most importantly—how to keep it from coming back.
Why Cast Iron Rusts (And Why We Use It Anyway)
Before we start scrubbing, it helps to know the enemy. Most quality band saws feature cast iron tops. We love cast iron because it’s heavy, which dampens vibration, and it can be machined dead flat.
However, cast iron is basically a sponge for moisture. It is highly reactive to oxygen and water. When moisture hits that raw iron, oxidation happens almost instantly.
There are generally three levels of rust you’ll encounter in the shop:
- Flash Rust: A light orange dust. You can wipe it off with your finger. This is easy to fix.
- Surface Scabbing: Rough patches that feel like sandpaper. This requires some elbow grease or chemical intervention.
- Deep Pitting: Dark, black spots where the metal has actually been eaten away. This requires aggressive sanding or even regrinding.
We are going to cover how to tackle all three.
Phase 1: Preparation and Safety
Don’t just grab a sander and go to town. You need to prep your machine to avoid damaging the sensitive bits.
1. Unplug the Machine
This is Woodworking 101. Never work on a tool that has power running to it. Unplug the saw and coil the cord.
2. Remove the Blade and Insert Plate
Take the tension off your blade and remove it completely. You don’t want to be fighting around a sharp blade while scrubbing, and you definitely don’t want rust remover chemicals dripping onto your tires or bearings. Pop the throat plate (insert) out as well.
3. Mask Off the Critical Areas
If you are using liquid rust removers or sprays, take some blue painter’s tape and mask off the miter slot and the opening for the blade. You want to keep the slurry out of the trunnions and the cabinet below.
4. Gear Up
Rust dust is nasty stuff to inhale. Wear a standard N95 dust mask. Also, throw on some nitrile gloves. The chemicals and oils we use to strip rust will dry out your hands faster than raw sawdust.
Phase 2: The Removal Process
The method you choose depends on how bad the rust is. I usually start with the least aggressive method and work my way up.
Method A: Light Rust (The “Elbow Grease” Approach)
If your table just has a light orange haze or some fingerprints, you don’t need power tools.
What you need:
- WD-40 or a similar penetrating oil (3-in-One works too).
- Red or Green Scotch-Brite pads (synthetic steel wool).
- Shop rags.
The Steps:
- Saturate the surface: Spray a generous coat of WD-40 over the table. Let it sit for about 5 minutes to soften the oxidation.
- Scrub: Take your Scotch-Brite pad and start scrubbing in a circular motion. Apply firm pressure. You’ll see the oil turn into a brown slurry. That’s the rust lifting off.
- Wipe and Repeat: Wipe off the slurry with a clean rag. If you still see orange, hit it again.
- Clean: Once the rust is gone, clean the entire surface with mineral spirits or denatured alcohol to remove the oily residue.
Method B: Moderate Rust (The Chemical Strike)
If the rust feels rough to the touch or covers a large area, I like to use a dedicated rust remover.
What you need:
- Rust remover liquid or gel (Evapo-Rust, CRC, or even white vinegar if you’re on a budget).
- Plastic wrap.
- Wire brush (brass is softer and safer for iron).
The Steps:
- Apply the chemical: Pour your rust remover onto the table. If you are using a gel, brush it on thick.
- Cover it up: This is the pro tip. Lay plastic wrap (Saran wrap) over the liquid. This prevents it from evaporating and forces the chemical to work on the metal.
- Wait: Let it sit for 30 minutes to an hour. Go sharpen some chisels while you wait.
- Agitate: Pull the plastic off and scrub with a brass wire brush or a coarse Scotch-Brite pad.
- Neutralize: Wipe it clean. If you used an acid-based remover (like vinegar), you must neutralize it by wiping the table down with a water/baking soda mix, followed immediately by drying and mineral spirits. If you leave acid residue, it will flash rust again within minutes.
Method C: Heavy Duty (The Power Sanding Method)
This is for neglected saws or severe pitting. We are going to remove metal here, so you need to be careful not to create a depression in the table. We want the table flat, not wavy.
What you need:
- Random Orbital Sander (ROS).
- Sanding discs: 220, 320, and 400 grit.
- Mineral spirits/Paint thinner.
The Steps:
- Lubricate: Never dry sand rust if you can avoid it—it loads up the paper instantly and throws toxic dust everywhere. I spray a little WD-40 or mineral spirits on the table to act as a lubricant. Note: Check your sander manual. If you have an electric sander with poor sealing, use very little liquid or sand dry with a good dust mask.
- Start with 220 Grit: Put a 220 disc on your ROS. Keep the sander moving constantly. Do not press down hard; let the weight of the sander do the work. Move in overlapping passes, just like you are finishing a tabletop.
- Check your progress: Wipe the table frequently. As soon as the heavy rust is gone, stop.
- Refine the scratch pattern: Switch to 320 grit, then 400 grit. This polishes the metal.
- Pro Tip: Don’t go higher than 400 or 600 grit. If you polish the table to a mirror finish (1000+ grit), you actually create a vacuum effect where the wood sticks to the table. You want microscopic scratches to reduce friction.
Phase 3: Cleaning and Degreasing
Once the rust is gone, your table probably looks gray and metallic, which is great. But it’s currently covered in oil, solvent, and iron filings.
- The Solvent Wipe: Take a clean rag and soak it in mineral spirits or denatured alcohol. Wipe the table until the rag comes up clean.
- The Dry: Let the solvents evaporate completely. The metal should be bone dry before the next step.
At this point, look closely at the table. If you had deep rust, you might see small black pits. Do not try to sand these out completely. If you try to grind down until the pits are gone, you will dish out your table and your cuts will never be square again. As long as the surface is smooth and the wood glides over the pits, they are cosmetic only. Call them “character marks.”
Phase 4: Protection (The Most Important Step)
You just stripped all the protection off that raw iron. If you walk away now, it will rust again by tomorrow morning. You need to seal the pores of the metal.
There are two main schools of thought here: Paste Wax vs. Dry Film Lubricants.
Option 1: Paste Wax (The Old School Standard)
This is what I’ve used for 20 years. It’s cheap, effective, and makes the wood slide like it’s on an air hockey table.
- Product: SC Johnson Paste Wax (if you can find it) or Minwax Paste Finishing Wax. Avoid automotive waxes that contain silicone. Silicone is the enemy of wood finishing. If silicone gets on your wood, your stain and finish won’t stick later.
- Application:
- Scoop a lump of wax into a rag.
- Rub it into the cast iron in tight circles. You want to force it into the pores.
- Let it haze over (usually 10-15 minutes).
- Buff it off with a clean microfiber cloth or an old t-shirt.
- Repeat. I always do two coats on a freshly restored table.
Option 2: Dry Film Sprays (The Modern Solution)
Products like Boeshield T-9 or GlideCote are excellent. Boeshield was developed by Boeing for aircraft parts. It penetrates deep and dries to a waxy film.
- Application: Spray it on, let it sit for the recommended time (usually overnight for deep protection, or wipe off after a few minutes for a working surface), and buff dry.
- Pros: Better long-term rust resistance than wax.
- Cons: More expensive.
My Recommendation: Use Boeshield T-9 to seal the metal, let it dry, and then put a coat of Paste Wax over the top for that slick, low-friction feel.
Phase 5: Prevention and Maintenance
Now that your band saw looks brand new, let’s keep it that way.
1. Control the Humidity
If your shop is in a garage or basement, humidity is the killer.
- Dehumidifier: Running a dehumidifier is the single best investment for your tools. Keep the humidity below 50% if possible.
- Heat: In the winter, temperature swings cause condensation. If you have a heater, try to keep the temperature relatively stable, or warm the shop up slowly.
2. Cover It Up
Make a simple cover for your band saw. It doesn’t have to be fancy—an old cotton bedsheet works perfectly.
- Avoid plastic tarps: Plastic traps moisture underneath it. Cotton breathes, keeping dust off while letting moisture escape.
3. The “End of Day” Ritual
Make this a habit: When you are done for the day, brush the sawdust off the table. Sawdust absorbs moisture from the air and holds it against the metal, creating rust spots exactly where the dust pile was. Wipe the table down, and if you live in a humid area, apply a quick layer of wax.
4. No Drinks on Tools
This is a shop rule written in stone. No coffee cups, water bottles, or sodas on the cast iron. The condensation ring will rust into the metal in less than 20 minutes.
5. Use Wax Paper for Glue-Ups
If you use your band saw table as a flat surface for gluing up projects (we all do it), put down wax paper. Wood glue contains water; if it drips on the iron, it will rust.
Frequently Asked Questions (FAQ)
1. Can I use vinegar to remove rust from my band saw table?
Yes, white vinegar is an effective, mild acid that dissolves rust. However, you must be careful. Vinegar contains water, so you need to work fast. Once the rust is gone, you must neutralize the acid with a baking soda/water solution, dry it immediately, and seal it. If you leave vinegar residue, it will actually promote new rust.
2. Is it okay to use a belt sander to clean the table?
Absolutely not. A belt sander is too aggressive and difficult to keep perfectly flat. You run a high risk of “dishing” the table or creating low spots. A Random Orbital Sander (ROS) or hand sanding with a block is much safer because it removes material slower and more evenly.
3. Why shouldn’t I use car wax on my woodworking tools?
Many car waxes contain silicone. While silicone makes cars shiny and water-repellent, it is a disaster for woodworking. If silicone transfers from your table to your wood, it causes “fisheyes” in finishes like polyurethane, lacquer, and varnish. Stick to silicone-free furniture paste wax or specialized tool protectants.
4. How often should I wax my band saw table?
It depends on how much you use it and your climate. In a climate-controlled shop, once a month is usually fine. In a humid garage, you might need to wax it weekly. A good rule of thumb: if the wood doesn’t glide effortlessly across the table, it’s time for a fresh coat of wax.
5. Will sanding the rust off affect the accuracy of the table?
If you use fine grits (220+) and keep the sander moving flatly, no. You are removing microns of material. However, if you aggressively grind one spot to remove deep pitting, you can create a depression. For deep pits, it is better to clean them out and leave the pit there rather than grinding the surrounding area down to match the bottom of the pit.
The Final Touch: Protection and Performance
Restoring a band saw table isn’t just about making the shop look pretty. It’s about respect for the tool and ensuring your work is accurate. A smooth, slick table allows you to feed wood effortlessly, giving you better control over the cut and reducing the chance of burning the wood or drifting off the line.
Don’t let a little orange dust intimidate you. With a little bit of solvent, some abrasion, and a good coat of wax, you can bring even the saddest looking table back to life.