If you’ve spent any time on a commercial jobsite or in a serious home workshop, you know the portable band saw (often affectionately called a “Portaband”) is one of the most versatile tools in the truck. It’s quiet, it doesn’t throw sparks like an abrasive chop saw, and it cuts through rebar, Unistrut, threaded rod, and pipe like butter.
But let’s be honest: while it’s great for cutting, it is notorious for being terrible at cutting straight.
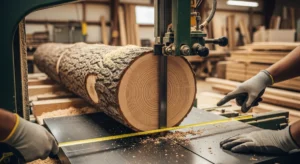
We’ve all been there. You grab the saw to make a quick cut on a piece of 2-inch square tube, and by the time you get to the bottom of the cut, the blade has wandered a quarter-inch to the left. You’re left with a jagged, angled mess that needs ten minutes of grinding to sit flush.
Achieving a square, straight cut with a handheld band saw requires a mix of proper machine setup, the right blade selection, and-most importantly-experienced body mechanics. It’s not a chop saw; you can’t just pull a trigger and drop the arm. You have to drive it.
In this guide, I’m going to walk you through exactly how I get factory-quality straight cuts out of a portable band saw, whether I’m framing up a metal deck or cutting conduit in a tight ceiling space.
Understanding Why the Blade Wanders
To fix the problem, you have to understand the physics of the tool. A portable band saw relies on a flexible, continuous loop of steel (the blade) held under tension between two pulleys. Unlike a circular saw or a reciprocating saw, the blade on a band saw has a tendency to twist and deflect.
The Path of Least Resistance
The number one reason your cuts aren’t straight is blade deflection. When you force the saw through the material faster than the teeth can clear the chips, the blade takes the path of least resistance. If the blade is slightly dull on one side (which happens common if you nicked a hard spot previously), it will naturally drift toward the sharp side.
The Lack of Reference
When you use a chop saw or a miter saw, you have a fence and a heavy base keeping everything square. With a portable band saw, you are the fence. You are the base. Every heartbeat, every shift in your weight, and every vibration translates directly to the cut.
Phase 1: The Hardware Setup
Before you even pull the trigger, you need to make sure your tool isn’t fighting you. I’ve seen guys struggle for years with a saw that simply needed a five-minute tune-up.
1. Check Your Guide Rollers
Take a close look at the blade guides—those little bearings or blocks that sandwich the blade near the cutting area. If those bearings are seized up with grime, or if they are worn out and wobbling, your blade has no lateral support.
- The Fix: Clean them with a little solvent and spin them. They should move freely. If there is a massive gap between the rollers and the blade, the blade can twist left or right before it even hits the material.
2. Blade Tension and Tracking
Most modern portable saws have auto-tensioning levers, but older models might need manual adjustment. If the blade is loose, it will belly in the cut, resulting in a concave face.
- Tracking: Flip the saw over and pull the trigger (safely). Watch the blade on the tires. It should ride in the center. If it’s riding the lip of the rubber tire, your blade is going to vibrate, making a straight line impossible.
3. The Shoe
Every portable band saw has a metal “shoe” or stop plate at the back of the cutting throat. This is your anchor point. If this shoe is bent (which happens when the tool gets tossed in the back of the van), you will never get a square cut because your reference point is crooked. Ensure your shoe is tight and square to the blade.
Phase 2: Blade Selection is Non-Negotiable
You cannot cut straight with the wrong blade. This is the hill I will die on. If you are trying to cut thin-wall conduit with a coarse 10 TPI (Teeth Per Inch) blade, the teeth will snag, causing the saw to jump and chatter. If you try to cut a solid 1-inch bolt with a fine 24 TPI blade, the gullets will clog, heat will build up, and the blade will warp and wander.
The “Three Tooth” Rule
For the smoothest, straightest cut, you generally want three to five teeth engaged in the material at any given time.
- Thick Material (Solid stock, heavy pipe): Use a lower TPI, like 10/14. The deep gullets clear chips out fast, keeping the blade cool and straight.
- Thin Material (Unistrut, thin conduit, sheet metal): Use a high TPI, like 18 or 24. This prevents the “chatter” that knocks your cut line off course.
Invest in Bi-Metal Blades
Stop buying the cheapest carbon steel blades. They dull after three cuts. Once a blade dulls, you have to apply more pressure to get it to cut. More pressure equals more deflection. Bi-metal blades stay sharp longer, meaning you can let the saw do the work rather than forcing it.
Phase 3: The Body Mechanics of a Straight Cut
Now that the tool is ready, let’s talk about you. Freehand cutting is a physical skill, much like shooting a free throw or swinging a hammer.
1. The Stance
Don’t cut with your arms extended fully away from your body if you can help it. Bring the work close to your core.
- Lock your elbows slightly against your ribs if possible. This turns your upper body into a tripod.
- Stand with your feet shoulder-width apart.
- When you make the cut, don’t push with your arms. Shift your weight forward. This provides a smooth, consistent pressure that arms alone cannot replicate.
2. Engage the Shoe First
Never start the cut by hovering the blade over the line.
- Place the metal shoe firmly against the workpiece.
- Tilt the saw up so the blade is not touching the material.
- Pull the trigger and let the motor get to full speed.
- Slowly lower the blade into the cut, keeping the shoe pressed hard against the material. The shoe acts as a pivot point. If the shoe loses contact, the saw will wobble.
3. Look at the Blade, Not the Guard
This sounds obvious, but you need to watch the exact point where the teeth meet the metal. I often tilt my head slightly to the side so I can see the back of the blade in the kerf. If the back of the blade is centered in the slot you just cut, you are straight. If the back of the blade is rubbing hard against one side of the kerf, you are twisting the saw.
4. Let the Tool Eat
This is the golden rule of band saws: Do not force it. A portable band saw cuts by abrasion and chip removal. If you lean on it with all your weight, you will bow the blade. Apply just enough pressure to keep the teeth engaged, and let the motor do the rest. If you feel like you have to push hard, your blade is dull. Change it.
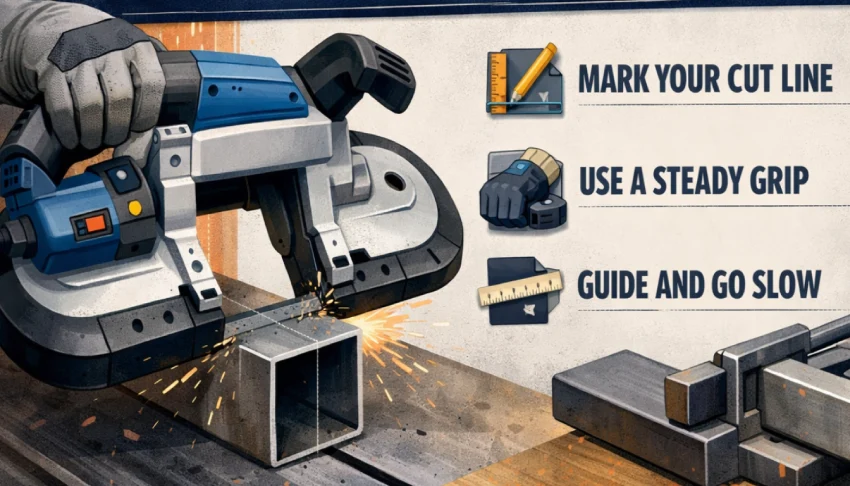
Phase 4: Marking and Scribing
A pencil line on the top of a pipe isn’t enough. When you are cutting round stock or thick square tubing, parallax error will kill you. You think you are cutting straight down, but you are actually angling 5 degrees toward your feet.
Scribe the Whole Circumference
If precision is critical (like for an exposed weld or a structural fit):
- Use a wrap-around (for pipe) or a speed square (for tube) to mark the line all the way around the material.
- As you cut, don’t just watch the top line. Watch the line on the vertical face facing you.
- Correct your angle so the blade tracks that vertical line perfectly.
The “Back Cut” Technique
For very thick material where the blade likes to wander near the bottom:
- Cut about halfway through from the top.
- Stop the saw, pull it out, and flip the material 180 degrees.
- Start a new cut from the other side and meet in the middle. This minimizes the distance the blade has to travel without support, effectively halving the drift.
Phase 5: Using External Guides
Sometimes, freehand just isn’t good enough. If I need a cut that looks like it came from a machine shop, I use a guide.
The Speed Square Trick
This is a classic jobsite hack, but you have to be careful.
- Hold a thicker speed square (like a Swanson) firmly against the material with your non-dominant hand (wearing heavy gloves).
- Rest the flat side of the saw’s shoe or the blade housing (depending on your model’s design) against the square.
- Use the square as a fence to guide the saw down.
Warning: Do not let the running blade teeth touch the speed square. It will eat your square and ruin the blade teeth. This trick relies on using the body of the saw against the square, not the blade itself.
Clamp-on Blocks
If I’m cutting a 4×4 post or a large piece of timber with a portable band saw (which works surprisingly well for timber framing), I will clamp a scrap piece of 2×4 right on my cut line. I then rest the side of the band saw motor housing against that 2×4. It acts as a physical barrier preventing me from drifting left.
Phase 6: The Ultimate Upgrade – Converting to Stationary
If you find yourself needing precision cuts constantly, stop fighting gravity. The absolute best way to cut straight with a portable band saw is to turn it into a stationary vertical band saw.
There are aftermarket tables available (Swag Offroad is the most famous example, but there are others) that allow you to mount your saw upside down.
- You bolt the saw into the stand.
- You use a trigger clamp to keep it running (or wire in a foot pedal).
- Now, you have a solid metal table.
With this setup, you can use a miter gauge or a rip fence. I have one of these setups in my trailer. It takes about 30 seconds to mount the saw, and suddenly I can slice Grade 8 bolts or hardwood shims with millimeter precision. If your jobsite allows for it, this is the game-changer.
Phase 7: Material-Specific Tips
Different materials react differently to the band saw blade. Adjusting your approach based on what you are cutting is the mark of a pro.
Stainless Steel
Stainless is hard and it work-hardens if you get it hot.
- Speed: Slow the saw down (use the variable speed dial).
- Pressure: Firm, consistent pressure. Do not let the blade rub without cutting, or the steel will harden and destroy the blade teeth.
- Straightness: Stainless resists cutting, so the blade will want to deflect more. Ensure your blade is fresh.
Threaded Rod
Threaded rod is a nightmare for straight cuts because the threads grab the teeth and try to pull the saw sideways.
- Tip: Spin a nut onto the rod before you cut. Place the nut right next to your cut line. If you mess up the threads slightly, unscrewing the nut will straighten them out (chasing the threads) as it comes off.
- Technique: Roll the rod as you cut if possible, or cut halfway and flip.
Unistrut / Strut Channel
The “U” shape makes the blade jump when it hits the gaps.
- Orientation: Try to cut from the “back” (the solid side) of the strut first. If you cut the open legs first, the blade vibration will be intense.
- Square: Use the flat back of the strut to index your shoe.
Troubleshooting Your Cuts
If you are following all the steps above and still cutting crooked, here is a quick diagnostic checklist:
- Is the blade installed backward? Don’t laugh. It happens. The teeth should point in the direction of the rotation (usually toward the rear of the saw/toward the shoe).
- Is the tire rubber worn? If the rubber tires on the pulleys are grooved or missing chunks, the blade will wobble.
- Is the workpiece vibrating? If the pipe or strut isn’t clamped down tight, the vibration will shake the blade off course. Secure your material closer to the cut zone.
- Are you rushing? The number one cause of bad cuts is impatience. Slow down. Listen to the motor. If the RPMs drop significantly, you are pushing too hard.
Frequently Asked Questions (FAQ)
Why does my portable band saw blade always drift to the right?
Blade drift usually happens for one of two reasons: either the blade is dull on one side (causing it to pull toward the sharp side), or you are applying uneven pressure. Try replacing the blade first. If it persists, check your guide bearings to ensure they are holding the blade straight and not pushing it out of alignment.
Can I use a portable band saw to cut wood?
Absolutely. While they are primarily designed for metal, they are excellent for cutting wood, especially for coping trim, rough-cutting lumber, or cutting curves in timber framing. However, standard metal blades cut wood slowly and can burn. If you cut a lot of wood, try to find a blade with a lower TPI (8-10 TPI) for faster, cooler cuts.
How tight should the blade be on a portable band saw?
Most modern saws (Milwaukee, DeWalt, Makita) have a tension lever that applies a preset amount of tension, so you can’t adjust it. However, if you have an older model or a variable tension saw, it should be tight enough that it doesn’t slip on the tires under load, but not so tight that it snaps. A good rule of thumb is that you should be able to flex the blade about 1/8th to 1/4th of an inch sideways with moderate finger pressure in the center of the cutting area.
What is the best TPI for general purpose cutting?
If you don’t want to change blades constantly, a 10/14 TPI variable pitch blade is the industry standard workhorse. It’s fine enough to cut Unistrut and conduit without snagging, but coarse enough to chew through 2x4s or thick pipe reasonably well.
Do I need to use cutting wax or lubricant?
For a portable band saw, you usually do not use liquid coolant (it makes a mess and can slip the tires). However, using a stick wax (cutting lubricant stick) applied periodically to the blade can significantly extend blade life and help produce smoother, straighter cuts, especially when working with aluminum or stainless steel.
Turning Good Cuts into Great Work
Cutting straight with a portable band saw is a rite of passage. It marks the transition from someone who just “make it fit” to a craftsman who takes pride in the fit and finish.
It starts with respect for the blade—choosing the right TPI and keeping it sharp. It continues with your body—locking your core, using the shoe as a fulcrum, and letting the tool do the work. And when absolute perfection is needed, it ends with using the right guides or table setups to remove human error.
Next time you pull that saw out of the truck, take ten seconds to check the guide rollers and inspect the blade. Those ten seconds will save you ten minutes of grinding later.
Now, go make some sawdust (or metal chips).