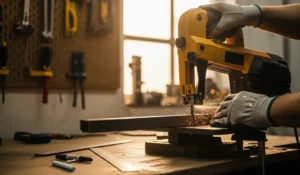
If you have ever spent a weekend hand-sanding complex molding or trying to strip ten layers of lead paint off a Victorian door with a heat gun, you have probably looked at your air compressor and thought: “Can I just sandblast this?”
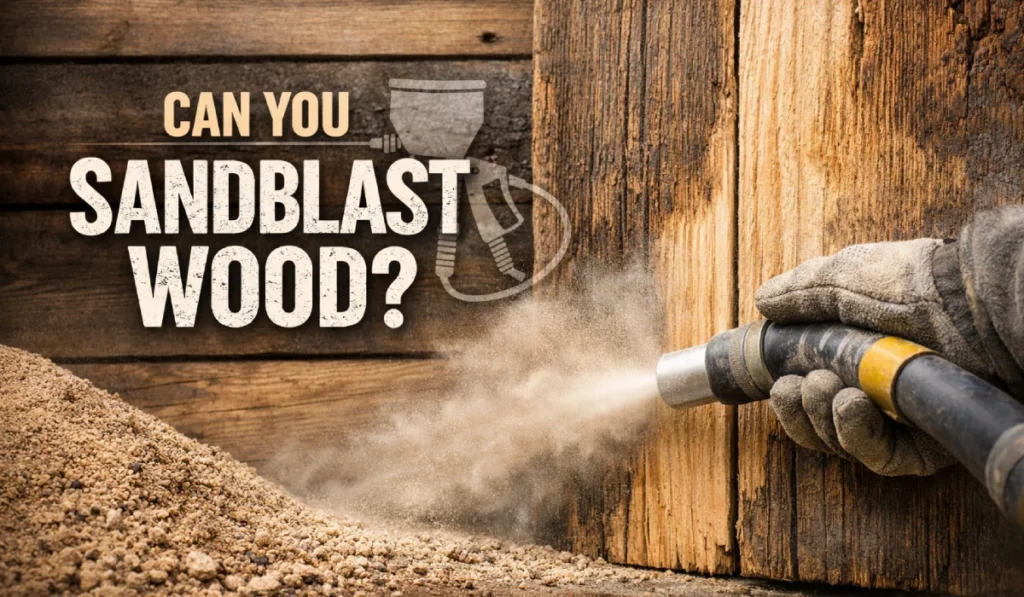
The short answer is yes, you can sandblast wood.
But here is the “jobsite reality” check: If you treat wood like rusty steel and hit it with coarse silica sand at 100 PSI, you aren’t going to clean it-you’re going to destroy it. Wood is organic and soft. Blasting it requires a completely different mindset than blasting metal.
In my years in the trade, I’ve used sandblasting to rescue intricate furniture, distress new beams to look like reclaimed timber, and strip siding efficiently. When done right, it is a game-changer. When done wrong, you turn a valuable piece of lumber into a fuzzy, pitted mess.
In this guide, I’m going to walk you through exactly how to sandblast wood without ruining your project, the specific media you need to buy (hint: put down the sand), and the safety gear you can’t ignore.
What Actually Happens When You Sandblast Wood?
To understand how to do this safely, you have to understand the mechanics. “Sandblasting”-or more accurately, abrasive blasting-shoots media at high velocity. On metal, this cuts through rust and paint to leave a clean surface.
On wood, the abrasive hits two different densities:
- Latewood (Summer wood): The hard, dark rings of the grain.
- Earlywood (Spring wood): The soft, light space between the rings.
Because the earlywood is softer, the blasting media eats it away much faster than the hard rings. This creates a raised grain effect. If you are looking for that weathered, 100-year-old barn wood look or a driftwood texture, this is actually a feature, not a bug.
However, if your goal is a perfectly flat, smooth surface for a dining table, sandblasting is generally not the right method unless you plan on doing some heavy sanding afterward.
The Golden Rule: Choosing the Right Media
The biggest mistake I see rookies make is grabbing a bag of “Play Sand” from the big box store. Do not do this. Not only is standard sand too aggressive for 90% of wood projects, but it also contains free silica, which causes silicosis (a permanent lung disease).
For wood, we use softer media. Here is my breakdown of what to load into your hopper.
1. Crushed Walnut Shells (The Gold Standard)
If I am blasting wood, 9 times out of 10, I am using walnut shells.
- Why it works: It is hard enough to strip varnish and paint but soft enough that it doesn’t gouge the wood immediately. It is biodegradable and relatively safe.
- Best for: Stripping antique furniture, cleaning delicate carvings, and removing finish without heavily raising the grain.
2. Corn Cob Grit
Think of this as the “gentle cycle” for sandblasting.
- Why it works: It absorbs oils and grease while gently removing surface dirt. It is very light and won’t etch the wood unless you really focus on one spot.
- Best for: Cleaning log cabins, removing smoke damage from fire-restored wood, and cleaning softwoods like Pine or Cedar.
3. Soda Blasting (Baking Soda)
Sodium bicarbonate is non-destructive, but it has a downside for woodworkers.
- Why it works: It explodes on impact, transferring energy without cutting. It’s incredibly gentle.
- The Catch: It can change the pH level of the wood. If you don’t neutralize the wood afterward with a vinegar wash, your new stain or paint might peel off or turn a weird color.
- Best for: extremely delicate restoration where you cannot afford any dimensional change.
4. Glass Beads
- Why it works: These are round, so they “peen” the surface rather than cut it.
- Best for: Creating a satin finish on harder woods, but usually overkill for general stripping.
Equipment: What You Need in the Shop
You don’t need an industrial tow-behind compressor to blast a chair, but a pancake compressor won’t cut it either. Blasting requires high CFM (Cubic Feet per Minute), not just high pressure.
The Compressor
You need volume. For continuous blasting, you need a compressor that delivers at least 10–15 CFM at 90 PSI. If you use a smaller shop compressor (like a 20-gallon unit), you will be blasting for 30 seconds and waiting 2 minutes for the tank to refill. It’s doable for small parts, but frustrating for big jobs.
The Blaster
- Pressure Pot: These are superior to siphon-feed guns. A pressure pot pushes the media out with air, giving you a consistent flow at lower pressures.
- Siphon Feed: These suck media from a bucket. They are cheap, but they often surge and clog, which can cause you to accidentally blast a hole in your wood when a clump clears.
Safety Gear (Non-Negotiable)
I’ve been on jobsites where guys blast in a t-shirt. Those guys usually have a chronic cough.
- Respirator: A proper N95 is the minimum, but a P100 half-mask is better. If you are doing a lot of this, get a positive-pressure hood.
- Eye & Face Protection: A full face shield is mandatory. Media bounces back.
- Coverage: Long sleeves and gloves. Getting hit by walnut shells at 80 PSI feels like getting stung by a swarm of angry bees.
Step-by-Step Guide to Sandblasting Wood
Okay, you have your walnut shells loaded and your compressor running. Here is how to execute the job without ruining the piece.
Step 1: Prep the Workpiece
Remove any hardware (hinges, knobs). If there is glass involved (like a cabinet door), you must cover it. Blue painter’s tape isn’t enough—the blast will eat right through it. Use heavy duct tape or, better yet, cut a piece of cardboard or plywood to shield the glass.
Step 2: Dial in the PSI
Start low. I usually set my regulator to 30–40 PSI to start.
- Test on a scrap piece of the same wood species if possible.
- If it’s not stripping the finish, bump it up in increments of 5 PSI.
- Warning: Once you go over 80 PSI on wood, you are entering the danger zone for severe pitting.
Step 3: Angle and Distance
This is where the skill comes in.
- Distance: Keep the nozzle about 6 to 10 inches away from the surface. Get too close, and you’ll dig a hole. Get too far, and the media loses energy.
- Angle: Never blast 90 degrees (perpendicular) to the wood. You want to blast at a 30 to 45-degree angle. This allows the media to “shovel” the paint off the surface rather than pounding it into the grain.
Step 4: Keep Moving
Treat the nozzle like a spray paint gun. Keep it moving in sweeping strokes. If you stop in one spot for even a second, you will eat away the earlywood and create a depression that is impossible to fix without planing the wood down.
Best Applications for Wood Sandblasting
Knowing when to sandblast is just as important as knowing how. Here are the scenarios where I recommend it.
1. Removing Lead Paint
Sanding lead paint creates toxic dust that goes everywhere. Chemical strippers are a gooey nightmare. Blasting (done wet or with a HEPA vacuum attachment) can be safer because it keeps the particles larger and heavier, dropping them to the ground rather than floating them in the air. Note: Always follow EPA guidelines for lead containment.
2. Creating “Driftwood” or Distressed Looks
If you are building a rustic farmhouse table or faux beams, sandblasting is the secret weapon. By using a slightly higher pressure, you blast away the soft grain, leaving the hard grain raised. Once you stain this, it looks incredible. The stain settles in the valleys, creating instant age and character.
3. Cleaning Intricate Carvings
I once restored a Victorian fireplace mantel with insane floral carvings. Sanding it by hand would have taken 100 hours. With crushed walnut shells, I cleaned the old varnish out of the crevices in about 2 hours, preserving the detail perfectly.
4. Timber Framing and Log Cabins
When restoring old log cabins, the logs are often dark from UV damage or rot. Corn cob blasting removes the rot and grey UV layer, bringing the wood back to a fresh, golden “new wood” look without damaging the structural integrity.
Risks and Troubleshooting
It’s not all sunshine and sawdust. Here are the things that can go wrong.
The “Fuzzy” Texture Problem
After blasting, the wood will feel fuzzy. This is because the fibers have been torn rather than cut.
- The Fix: You cannot skip sanding entirely. After blasting, you will need to do a quick pass with 120 or 150-grit sandpaper (or a nylon flap wheel) to knock down the fuzz before applying a finish.
Warping Thin Wood
Blasting creates friction and heat. If you blast thin panels (like door veneers), the heat and pressure can actually warp the wood or blow through the veneer entirely.
- The Fix: Do not sandblast veneer. Solid wood only.
Moisture Issues
Compressors generate water. If your air isn’t dry, you are shooting water onto bare wood. This can raise the grain even more or cause water spots.
- The Fix: Install a moisture trap or air dryer between your compressor and the blast pot.
Sandblasting vs. Chemical Strippers vs. Heat Guns
Is blasting always the best choice? No. Here is a quick comparison table to help you decide.
| Method | Speed | Risk to Wood | Mess Factor | Best For |
| Sandblasting | Fast | Moderate (can pit) | High (dust everywhere) | Complex shapes, rustic textures, large areas. |
| Chemical Stripper | Slow | Low | High (gooey sludge) | Fine furniture, veneers, antiques. |
| Heat Gun | Medium | High (burn marks) | Low | Flat surfaces with thick paint layers. |
| Sanding | Slow | Low | High (fine dust) | Final finishing, flat surfaces. |
Conclusion: Should You Pull the Trigger?
Sandblasting wood is a power move. It saves massive amounts of time on the right projects. If you are working on a reclaimed beam mantel, stripping a cast-iron and wood bench, or trying to get that heavy grain texture on a sign, it is the best tool for the job.
But if you are refinishing your grandmother’s mahogany dining table? Keep the blaster away. Stick to chemical strippers and elbow grease.
My advice: Buy a 50lb bag of fine walnut shells, grab a scrap piece of Pine and a scrap piece of Oak, and practice. Play with the pressure. See how the grain reacts. Once you get the feel for it, you’ll wonder why you spent so many years scraping paint by hand.
FAQs
Can I use playground sand to blast wood?
No. Playground sand is too coarse and often contains moisture. More importantly, blasting with silica sand creates dangerous dust that can damage your lungs. Always use specific blasting media like walnut shells or corn cob.
Does sandblasting warp wood?
It can. The friction from the abrasive creates heat. On thin wood panels or veneers, this heat—combined with the pressure-can cause warping or delamination. Stick to solid, thick lumber.
How do I smooth wood after sandblasting?
Sandblasting leaves a pitted, fuzzy surface. To smooth it, use a random orbital sander with 120-grit paper for flat areas, or a nylon abrasive brush wheel for contoured areas to knock down the fibers without removing the texture.
What size air compressor do I need for sandblasting wood?
Sandblasting is an “air hungry” process. You ideally want a compressor that outputs at least 10 CFM at 90 PSI. Smaller compressors will work, but you will have to stop frequently to let the tank recharge.