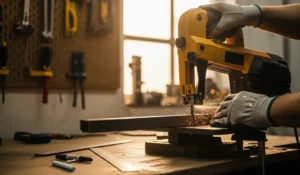
If there is one tool in the shop that causes more headaches than any other, it’s the bandsaw. You line up your fence, you double-check your measurements, you push that expensive piece of walnut through, and halfway down the cut, you realize the blade has wandered a quarter-inch off your line. You’re left with a ruined board and a whole lot of frustration.
We call this “drift.”
I’ve been working with bandsaws for over twenty years, from massive 36-inch ship saws to the 14-inch cast iron workhorses found in most garages. I’ve heard every myth out there about why drift happens. Some guys will tell you that every blade has a “natural drift angle” that you have to compensate for. Others will tell you your saw is just cheap.
Here’s the truth: A properly tuned bandsaw should not drift.
If your blade is wandering, it’s not a personality quirk of the machine; it’s a physics problem. It usually comes down to the blade condition, the tension, or the tracking. Today, I’m going to walk you through exactly how I diagnose and fix bandsaw drift in my shop. We are going to strip it down, set it up right, and get you cutting veneers so thin you can read a newspaper through them.
Understanding the Beast: What Actually Is Drift?
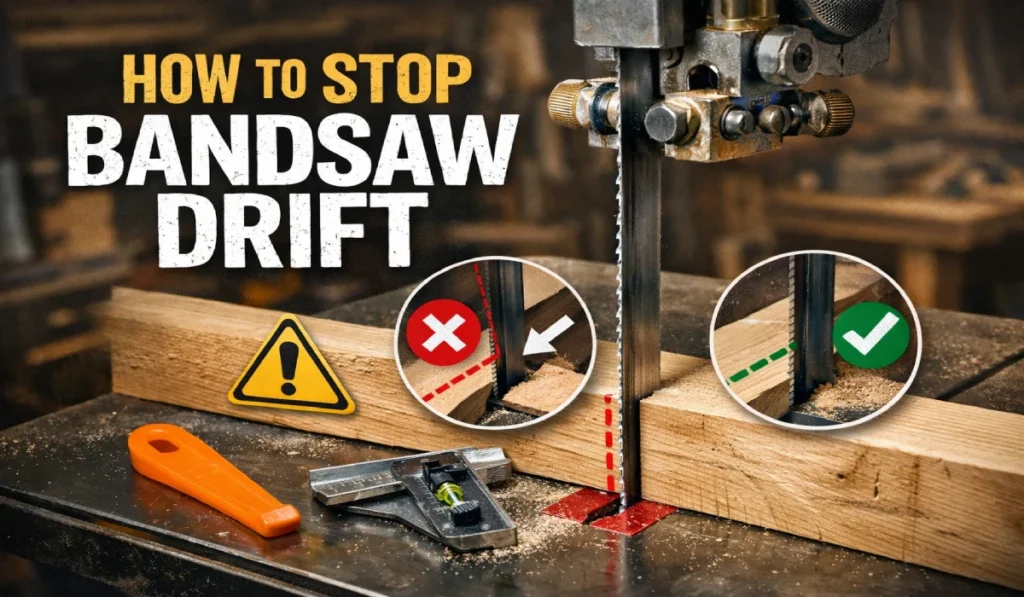
Before we grab the wrenches, let’s get on the same page. Drift” is the tendency of a bandsaw blade to not cut parallel to the fence. Instead of cutting in a straight line relative to the miter slot, the blade “leads” to the left or right.
When this happens, you end up fighting the wood. You’re pushing forward, but you also have to apply side pressure to keep the cut on the line. That creates friction, heat, and eventually, a bowed or “barrel” cut where the blade wanders inside the wood where you can’t even see it.
Drift happens for three main reasons:
- The Blade: Dull teeth or uneven “set” on the teeth.
- The Setup: Improper tracking on the wheels.
- The Tension: Not enough beam strength in the blade.
Let’s tackle these one by one.
Step 1: The Blade is Usually the Culprit
I’d say 80% of the time someone asks me to fix their saw, the problem isn’t the saw at all. It’s the piece of steel spinning around it.
Is it Dull?
A dull blade will always drift. As the points of the teeth round over, you have to push harder to get the wood through. The harder you push, the more likely the blade is to deflect (twist) sideways. No amount of guide bearing adjustment will fix a dull blade. If you’ve been running that same 1/2-inch blade for six months of heavy cutting, take it off and throw it in the recycling bin. Buy a new one.
Check the “Set” of the Teeth
The “set” refers to how the teeth are bent—left, right, left, right. This creates a kerf (slot) wider than the blade body, allowing the back of the blade to pass through without friction.
If you hit a nail, a hard knot, or even just dropped the blade on the concrete floor, you might have damaged the set on one side. If the teeth on the left side are duller or bent in less than the right side, the sharp right-side teeth will cut more aggressively. The blade will literally pull itself to the right.
The Test: Take a look at your cut. Is it drifting consistently in one direction? Flip the board over and cut again. If it still drifts the same way relative to the blade, your blade is likely compromised. Swap it out before you start messing with the machine settings.
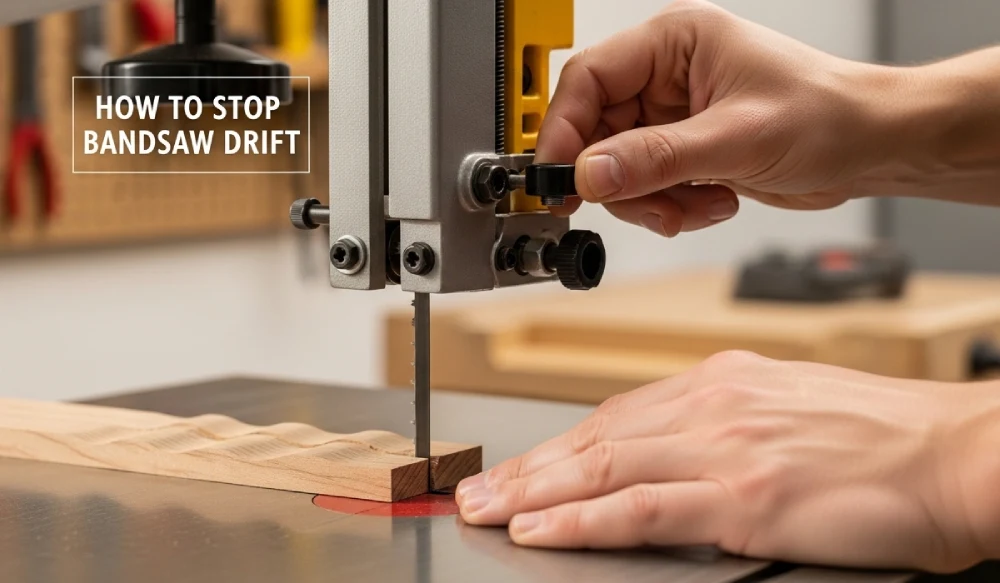
Step 2: Tracking and “Coplanar” Wheels
If your blade is sharp and high-quality (I prefer silicon steel or carbide-tipped for resawing), but you still have drift, we need to look at the tires.
Most modern bandsaws have crowned tires—they are slightly humped in the middle. The physics of a crowned pulley dictates that a flat belt (your blade) will want to ride to the highest point of the crown.
The Sweet Spot
Many manuals tell you to center the blade on the tire. However, for 1/2-inch blades and larger, I find that centering the blade body often isn’t enough. You want to track the blade so the gullets (the valleys between the teeth) are right in the center of the tire.
Why? If the teeth are digging into the rubber tire, two things happen:
- You ruin your tires.
- The set of the teeth gets compressed by the rubber, ruining the blade’s ability to clear sawdust.
Adjust the tracking knob on the back of the upper wheel housing while spinning the wheel by hand (unplug the saw first, obviously). Watch the blade ride. You want it stable, with the teeth just floating off the front edge of the crown or the gullets dead center.
The Coplanar Myth?
You’ll hear old-timers talk about making the wheels “coplanar” (meaning the top and bottom wheels are perfectly aligned on the same plane). While this is vital for flat-tire saws (like huge antique shipsaws), on modern crowned-tire saws, it’s less critical than people think.
However, if your tracking is way off, check it. Place a long straightedge across the top and bottom wheels. They should touch at four points (top and bottom of both wheels). If the top wheel is tilted way back to get the blade to track, your chassis might be twisted or the lower wheel needs adjustment. Fix the alignment first, then track the blade.
Step 3: Tension is Your Best Friend
This is where most hobbyists get it wrong. They are afraid of snapping the blade, so they undertension it.
Here is the reality: A loose blade is a wandering blade.
When you push wood into the saw, you are applying force against the front of the blade. If the blade lacks “beam strength” (stiffness caused by tension), it will deflect backward. Once it deflects backward, it becomes unstable and twists. That twist is drift.
Ignore the Gauge on the Back
Most bandsaws have a little spring-loaded scale on the back that says “1/4,” “1/2,” “3/4.” Do not trust this scale. It is almost always inaccurate, and it usually measures the compression of a cheap spring, not the actual tension on the blade.
The Flutter Method
Here is how I tension my saws without expensive tension gauges:
- Raise the guides: Get the guide bearings all the way up and out of the way.
- Turn it on: Power up the saw.
- De-tension: While it’s running, slowly loosen the tension knob. Watch the blade. It will start to vibrate or “flutter” side-to-side.
- Tension up: As soon as you see that flutter, slowly start tightening the knob.
- Find the sweet spot: Keep tightening until the flutter disappears and the blade runs smooth and straight.
- Add the “insurance” turn: Once the flutter is gone, give the knob one more quarter or half turn.
This puts the blade at the optimal tension for that specific piece of steel. A properly tensioned blade resists twisting, which eliminates drift at the source.
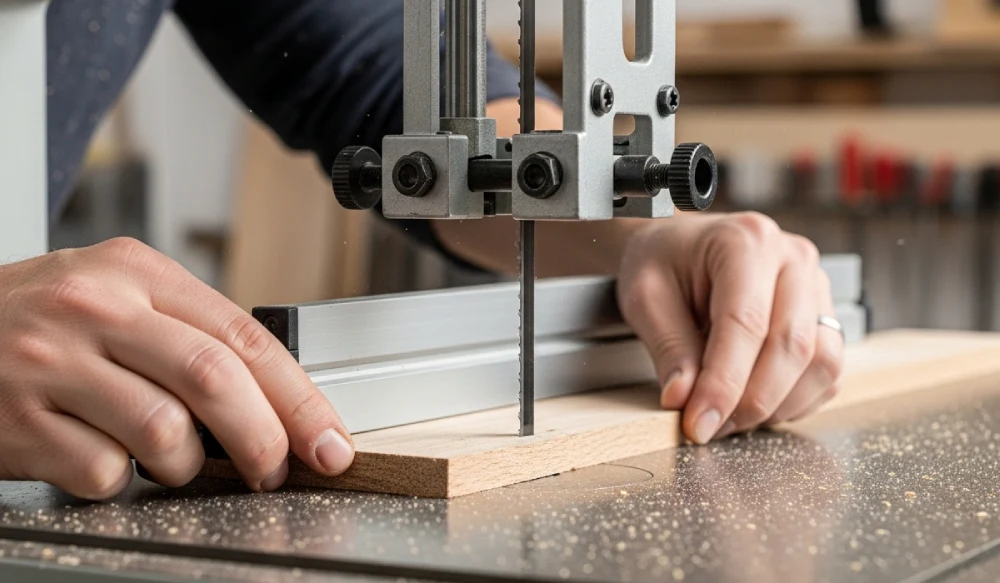
Step 4: Setting the Guides (The Dollar Bill Trick)
Now that the blade is tracking and tensioned, we bring in the guides. Whether you have European-style roller bearings or Cool Blocks, the principle is the same.
Crucial Rule: The guides do not control the blade’s path; they only limit its deflection. If you are using the guides to force the blade straight, you are doing it wrong.
- Thrust Bearing (The one behind the blade): Bring this forward until it is almost touching the back of the blade. I like to leave a gap about the thickness of a piece of paper. It should only spin when you are actually cutting wood.
- Side Bearings: These keep the blade from twisting. Bring them in close.
- My Trick: I use a dollar bill or a piece of standard printer paper. Place it between the blade and the bearing. Tighten the bearing against the paper, then lock it down. Pull the paper out. This leaves a spacing of about 0.003 to 0.004 inches—perfect clearance.
If these are set right, the blade flows freely but hits a “wall” the moment it tries to twist.
Step 5: The “Drift Compensation” Technique
Okay, you’ve done everything above. The blade is new, tension is high, tracking is perfect. But when you use the fence, it still binds or drifts slightly.
Sometimes, a specific blade just wants to cut at a slight angle. This is rare with high-quality carbide blades, but common with cheaper stamped blades. Instead of fighting it, we adjust the fence to match the drift.
Here is the Scribe Method I use on every job site:
- Get a Scrap Board: Find a piece of plywood or MDF with a perfectly straight edge.
- Mark a Line: Draw a pencil line parallel to that straight edge, about 3 inches in.
- Freehand Cut: Turn on the saw and cut along that line freehand. Do not use the fence. Just follow the line with your eye.
- Stop Halfway: Once you have cut about halfway through the board and you are following the line perfectly, stop the feed. Hold the board dead still. Turn off the saw.
- Adjust the Fence: Without moving the board, loosen your fence. Slide it up to the straight edge of your scrap board.
- Lock the Angle: If the fence doesn’t sit flush against the board, you have drift. Adjust the “skew” of your fence (most fences have bolts for this) until the fence is perfectly parallel to the board you just cut.
Lock it down. Now, your fence is aligned to the blade’s natural cutting path, not the miter slot. You can now rip straight lines all day long.
Bonus Tips for Drift-Free Cutting
Check Your Feed Rate
Patience is a virtue in woodworking. If you force the wood into the blade faster than the gullets can clear the sawdust, the dust packs tight between the blade and the wood. This pushes the blade sideways. Listen to the saw. If the motor bogs down, ease off. Let the tool do the work.
Choose the Right Blade
If you are ripping thick hardwood (resawing), you need a blade with fewer teeth. A standard 6 TPI (Teeth Per Inch) blade will choke in 6-inch thick maple. The heat will cause the metal to expand and warp, leading to massive drift.
- For Resawing: Use a 3 TPI blade or a specialized “Resaw King” style blade. The deep gullets clear dust efficiently, keeping the cut cool and straight.
Round the Back of the Blade
This is an old-school trick. Take a sharpening stone and gently hold it against the back corners of the blade while it’s running (be extremely careful). By slightly rounding off the sharp rear corners of the blade coil, you allow the wood to turn tighter curves without catching, but it also helps the blade glide smoother in a straight cut, reducing friction-induced drift.
Frequently Asked Questions (FAQ)
1. Why does my bandsaw blade always drift to the left?
Drift to one specific side usually indicates uneven wear on the blade’s teeth. If the teeth on the right side are duller than the left (perhaps from hitting a hard knot or metal), the sharp left teeth will cut faster, pulling the blade to the left. It can also be caused by the blade not tracking on the center of the tire crown.
2. How tight should a bandsaw blade be to stop drift?
Ideally, you want the highest tension the blade can handle without breaking or stressing the machine frame. For a standard 1/2-inch blade, this is often higher than the factory gauge indicates. Use the “flutter method” (tighten until vibration stops, then add a quarter turn) to ensure adequate beam strength to resist twisting.
3. Can a bad bandsaw fence cause drift?
Yes. If your fence isn’t 90 degrees vertical to the table, or if it isn’t parallel to the miter slot (and the blade’s cut path), it will force the wood into the side of the blade. This creates side-load pressure, causing the blade to wander. Always square your fence to the table and the blade.
4. Do wider blades reduce drift?
Generally, yes. A wider blade (like 3/4″ or 1″) has more “beam strength” (front-to-back stiffness) than a narrow 1/4″ blade. This makes it harder for the blade to twist or deflect under pressure. For straight ripping and resawing, always use the widest blade your saw can handle.
5. How often should I change my bandsaw blade to prevent drift?
It depends on the wood you cut. For abrasive woods like teak or exotic hardwoods, a blade might dull after just a few hours of cutting. For soft pine, it could last months. As soon as you feel like you have to push the wood harder to get it to cut, the blade is dulling. Change it immediately to prevent drift and motor strain.
Conclusion: It’s About Maintenance, Not Magic
Stopping bandsaw drift isn’t about buying a $5,000 Italian bandsaw (though they are nice). It’s about understanding the relationship between the steel, the tire, and the tension.
Drift is a symptom of a setup that is out of balance. If you keep your blades sharp, your tension high, and your guides tight, your bandsaw will transform from a frustrating jagged-line generator into a precision instrument capable of slicing veneers as thin as a playing card.
Go out to the shop, unplug the saw, and run through this checklist. I guarantee your next cut will be straighter. Stay safe and keep making sawdust.