If you have spent enough time in the shop, you know the sound. You turn on your bandsaw, and instead of that smooth, continuous hum, you hear a rhythmic thump-thump-thump. Or maybe you are trying to resaw a beautiful piece of cherry, and the blade just wanders no matter how much tension you dial in.
Before you go blaming your fence or buying a pricey new carbide blade, check the shoes on that machine. I’m talking about the bandsaw tires.
In my years on the jobsite and in the shop, I’ve seen more saws “fixed” just by replacing $30 worth of rubber than by any other method. But here is the kicker: buying the wrong size tire is easier than you think. There is a lot of bad info out there telling folks to measure the wrong things.
Today, we are going to walk through exactly how to figure out what size bandsaw tire you actually need, why measuring the old one is a trap, and how to choose between the different materials available today.
The “Rubber Band” of the Woodshop
First, let’s clear up what we are actually looking at. The bandsaw tire is that strip of rubber or urethane that wraps around the upper and lower wheels of your saw. It serves three critical functions:
- Traction: It grabs the blade so the drive wheel can actually spin it.
- Cushioning: It protects the set of the blade teeth from getting flattened by the metal wheel.
- Tracking: Most importantly, the tire usually provides a “crown” (a slight hump in the middle) that uses physics to keep the blade centered on the wheel.
When these tires dry rot, crack, or flatten out, your saw performance tanks. If you are reading this, you probably already suspect yours are toast. So, how do we size them up for a replacement?
The Golden Rule: Measure the Wheel, Not the Tire
If you take only one thing away from this article, let it be this: Do not measure your old bandsaw tire to determine the replacement size.
I see this happen all the time. A guy pulls a snapped rubber tire out of the bottom of the saw cabinet, lays it out flat on the workbench, measures the length, does some math to find the diameter, and orders a replacement based on that number.
Here is why that fails: Old tires stretch. That is their job. They are under constant tension for years, sometimes decades. If you measure a tire that has been on a 14-inch Delta for 15 years, it’s going to measure significantly longer than a brand-new tire. If you order a tire based on the stretched dimensions, the new one will be too loose. It will fly off the wheel the second you turn the machine on, potentially ruining your blade or causing an injury.
You need to measure the machine, not the part you are throwing away.
Step-by-Step: Determining the Correct Size
Ready to get your hands dirty? Unplug your saw-seriously, pull the plug-and let’s get the right numbers.
1. Strip the Wheel
Open up the upper and lower cabinet doors. Release the blade tension completely and take the blade off. You need clear access to the wheel itself. If the old tire is still on there and it’s in one piece, pry it off with a flathead screwdriver or a putty knife. You want to measure the bare metal (or aluminum) of the wheel.
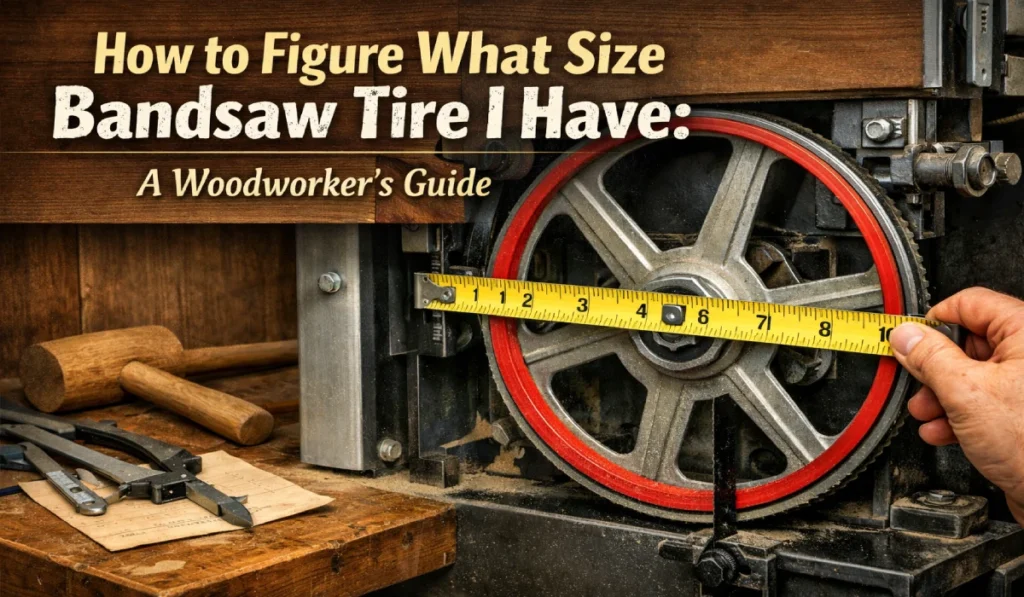
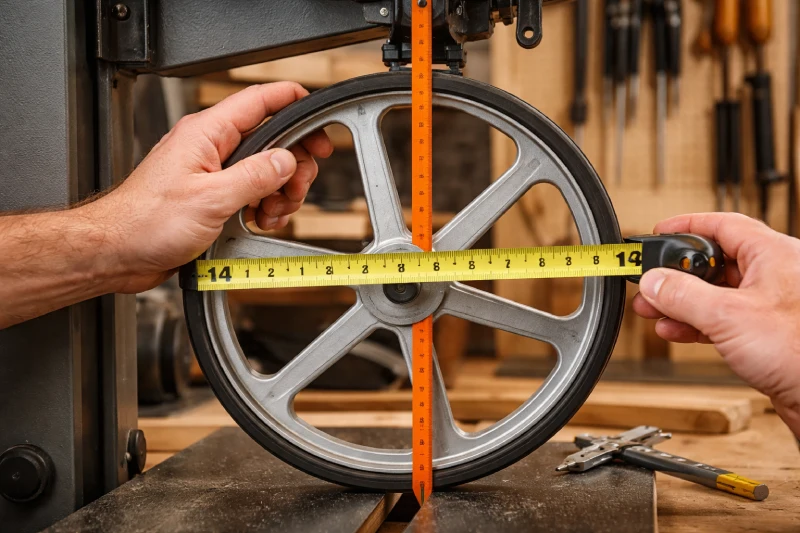
2. Measure the Wheel Diameter
Take a tape measure or a quality yardstick. Measure from the outer edge of the rim, directly across the center hub, to the opposite outer edge.
- The “Nominal” Standard: In the U.S., bandsaws are almost always categorized by this wheel diameter. If you measure 14 inches, you have a 14-inch bandsaw. If you measure 13-3/4 inches, it is still considered a “14-inch” saw in the trade. If you measure 9 inches, it’s a 9-inch benchtop model.
- The “Undersize” Reality: Replacement tires are sold based on this nominal wheel size, but they are manufactured smaller than that diameter. A tire sold for a “14-inch wheel” might actually be 12.5 or 13 inches in diameter when it’s sitting loose in the box. It has to be smaller so you can stretch it on tight.
Pro Tip: If your measurement falls between standard sizes (like 13.5 inches), round up to the nearest standard inch for the category of the saw, but read the manufacturer specs on the tire carefully.
3. Measure the Wheel Width
This is the measurement often overlooked. While diameter determines the “size” of the tire you buy, the width determines if it will actually fit your rim. Place your calipers or tape measure across the flat surface of the wheel rim.
- Standard widths are usually 7/8″, 1″, or 1.5″.
- You want a tire that is slightly narrower than or exactly the width of the wheel. You never want the tire hanging off the edge of the rim. If your wheel is 1 inch wide, a 1-inch tire is perfect. If you buy a 1.5-inch tire, you’re going to have a nightmare trying to trim it, and it will likely interfere with the blade guards.
4. Check for Grooves
Most modern and vintage standard bandsaws (Delta, Jet, Powermatic, Rikon) have flat wheels. However, some smaller benchtop models (like older Craftsman 10-inch saws or Ryobi models) have a specific groove or channel in the wheel that the tire snaps into.
- Flat wheels: Take standard flat tires.
- Grooved wheels: Require specific molded tires that have a rib on the underside. If you have this type, you must buy the specific part number for your model; generic “stretch-to-fit” tires won’t work safe.
Material Selection: Rubber vs. Urethane
Once you know you need, say, a 14-inch tire with a 1-inch width, you have a decision to make. Do you go old school with Rubber or modern with Urethane?
I have run both extensively. Here is the breakdown.
Rubber Tires (The Traditional Choice)
For decades, this was the only option. They are usually black and feel just like a car tire.
- Pros: They are generally softer, which some woodworkers feel gives a smoother “cushion” for the blade. They are often cheaper upfront.
- Cons: They almost always require adhesive. You have to use a specialty rim cement or weatherstrip adhesive to glue them to the wheel. If you don’t glue them perfectly, you get lumpy spots that cause vibration. They also dry rot faster—usually within 5 to 10 years they will start cracking.
- The Verdict: I only use these now if I’m doing a museum-quality restoration on an antique saw and want it to look 100% original.
Urethane Tires (The Modern Standard)
These are usually bright orange or blue (though you can find black ones).
- Pros: No glue required. They rely on extreme tension to stay on the wheel. This means no messy adhesive and no lumpy spots. They are impervious to oil and ozone, meaning they don’t dry rot. I have urethane tires on a saw that have been there for 15 years and look brand new.
- Cons: They are stiffer and harder to install. Because they don’t use glue, they are sized significantly smaller than the wheel, meaning you have to muscle them on.
- The Verdict: For 99% of woodworkers, buy Urethane. The longevity and lack of messy glue make it a no-brainer.
Installation: The Fight for the Fit
Knowing the size is half the battle; getting the new tire on is the other half. If you bought a Urethane tire, you might open the box, hold it up to your 14-inch wheel, and panic because the tire looks like it belongs on a tricycle.
Relax. It’s supposed to be that small. Here is how I install them without losing a finger.
1. Clean the Wheel Thoroughly
If you had rubber tires before, there is likely old, crusty glue on the wheel. You need to get this off. Use a solvent (like mineral spirits or acetone) and a stiff wire brush or Scotch-Brite pad. The metal should be clean and smooth. Any leftover chunk of glue will create a “high spot” that will make your blade jump every time it passes that point.
2. The Hot Water Trick
Urethane is a thermoplastic. It gets softer when it’s hot. Fill a bucket with hot tap water (not boiling, just very hot) and soak the new tires for about 10-15 minutes. This makes them significantly more pliable and easier to stretch.
3. The Clamp Method
This is my go-to move for installation.
- Take the warm tire and loop it over the top of the wheel.
- Use a spring clamp or a quick-grip clamp to hold the tire against the wheel at the 12 o’clock position.
- Work your way down the sides, stretching as you go.
- Use two more clamps at the 4 o’clock and 8 o’clock positions if you can.
- When you get to the bottom, use a smooth dowel or a screwdriver shaft (be careful not to gouge the tire) between the tire and the wheel to leverage the final section on.
- Once it’s on, take a dowel rod, insert it under the tire, and run it all the way around the rim. This equalizes the tension so the tire isn’t stretched thin in one spot and thick in another.
How Size Affects “Crowning”
You might notice that your metal bandsaw wheels are slightly crowned—they are higher in the center than on the edges. Or, on some saws, the wheel is flat, and the tire itself has a crown molded into it.
This crown is essential. Bandsaw blades track to the highest point of the wheel.
If you buy a tire that is too wide for your wheel, it won’t sit flat, and it won’t crown correctly. If you buy a tire that is too thin (thickness-wise), it might not provide enough clearance for the blade teeth, ruining the set of your blade.
Standard Thickness: most aftermarket tires are about 0.095″ to 0.125″ thick. This is standard and works for almost all saws. Unless you have a very specific industrial machine, you don’t need to stress too much about the thickness measurement, provided you are buying from a reputable woodworking supplier.
Troubleshooting: “Did I Buy the Wrong Size?”
So you bought the tires, installed them, and things feel off. Here are the signs you might have the wrong size (or a bad install):
1. The Tire Slips: If you turn the saw on and the wheel spins inside the tire, the tire is too big. This happens if you measure the old tire and buy a replacement that matches that stretched length. You need a smaller diameter tire.
2. The Blade Won’t Track: If the blade keeps falling off the front or riding hard against the back bearings no matter how you adjust the tracking knob, check the tire width. If the tire is too narrow and wandering around the rim, or too wide and bunched up at the edges, the crown is distorted.
3. Excessive Vibration: This is usually an installation error, not a size error. It means the tire is stretched unevenly. Go back to the dowel rod trick—lift the tire and let it snap back down to equalize the tension all around the wheel.
Frequently Asked Questions (FAQ)
How do I know if my bandsaw tires need replacing?
Inspect the tires for cracks, brittleness, or missing chunks. If the tire feels hard like plastic rather than grippy like rubber, it’s time to change them. Also, if you can see a deep groove worn into the center where the blade rides, that groove makes tracking difficult, and the tires should be replaced.
Can I use electrical tape instead of a real bandsaw tire?
In an emergency? Maybe for a few cuts. But as a permanent solution? Absolutely not. I’ve seen guys wrap wheels in tape or inner tubes, and it always ends in bad cuts and vibration. The proper crown and consistent thickness of a real tire are essential for blade tracking and safety.
Do I need to glue urethane bandsaw tires?
No. Urethane tires are designed to be undersized so they stretch tightly onto the wheel. The tension alone holds them in place. In fact, using glue with urethane tires makes them incredibly difficult to remove later and can create lumpy uneven spots that cause vibration.
Why is my new tire smaller than the wheel?
This is intentional. Tires must be smaller than the wheel diameter (usually by 1 to 2 inches) so they can be stretched on tightly. If the tire were the exact same size as the wheel, it would slip and spin loose as soon as the saw started running.
How often should I replace bandsaw tires?
It depends on the material and usage. Standard rubber tires usually last 5-10 years before drying out. Urethane tires can last 15-20 years or more because they don’t dry rot. However, if you use the saw daily, the mechanical wear might require you to change them sooner.
Better Tires, Better Cuts, Better Woodworking
Figuring out what size bandsaw tire you have isn’t about deciphering the serial numbers on your machine or measuring a pile of rotted rubber. It’s about grabbing a tape measure and checking the steel wheels themselves.
Whether you have a classic 14-inch Delta, a massive 20-inch resaw monster, or a little 9-inch benchtop unit, the wheel diameter dictates the tire size. Don’t overcomplicate it. Measure the wheel diameter, match the width, and upgrade to urethane.
Your bandsaw is the heart of your shop. It’s the machine that lets you turn straight boards into curves, resaw lumber into veneers, and cut joinery. Give it a good set of tires, and it will pay you back with smooth, straight cuts for years to come.