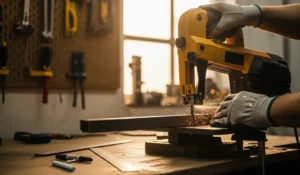
If you’ve spent any time on a jobsite or in a fabrication shop, you know the portable band saw-often affectionately called a “portaband”-is an absolute beast. Whether it’s a Milwaukee Deep Cut, a DeWalt, or a Harbor Freight Bauer, these tools chew through rebar, conduit, and uni-strut like it’s butter.
But here’s the problem: they are designed for rough cuts. Trying to get a precise, square 90-degree cut on a small bolt or a piece of hardwood stock while holding a 15-pound vibrating machine in the air is nearly impossible.
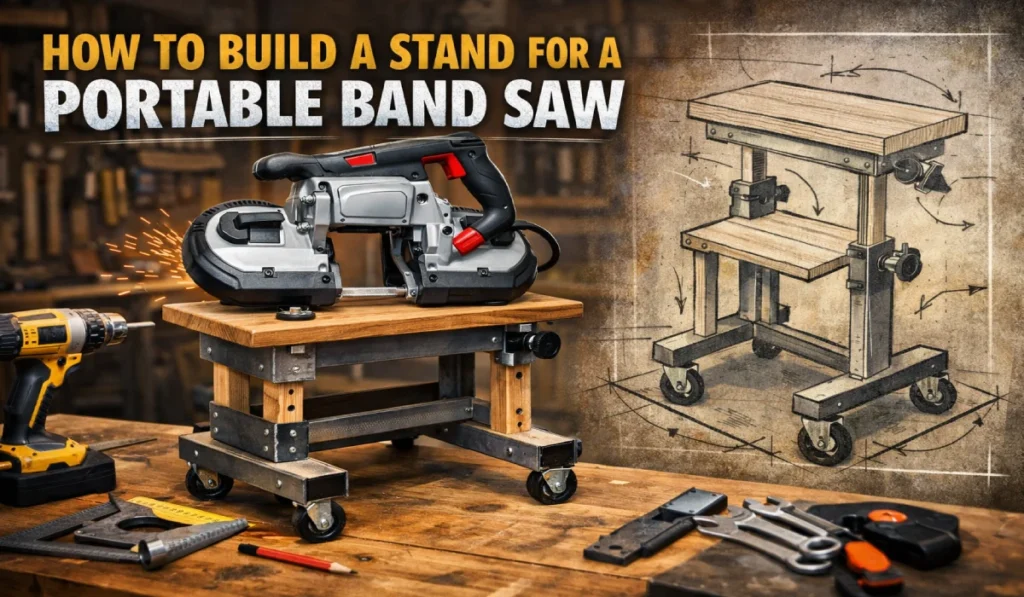
That’s where the vertical stand comes in.
By mounting your portable band saw into a stationary table, you essentially get a mini-metalworking band saw (or a detail saw for wood) for a fraction of the cost of a dedicated floor model. It’s one of the highest-value shop projects you can build.
In this guide, I’m going to walk you through how to build a rock-solid stand for your portable band saw. We aren’t just slapping plywood together; we are building a jig that is safe, accurate, and durable enough for daily shop use.
Why Build Instead of Buy?
You might have seen the manufactured steel stands available online (SWAG Offroad makes a legendary one). They are fantastic, but they can run you upwards of $150 to $200 once you factor in shipping and accessories.
As a craftsman, you probably have enough scrap 3/4-inch plywood lying around to build this for free. Plus, building it yourself allows you to:
- Customize the table height to match your workbench.
- Add custom fences or miter slots.
- Build in dust collection (which the factory stands rarely handle well).
Safety First: The “Deadman” Switch
Before we cut a single piece of wood, we have to talk about the trigger.
Portable band saws have a trigger on the handle. To use the saw in a stand, you have to lock that trigger in the “ON” position. Most guys use a zip-tie or a Velcro strap.
Here is the danger: If you zip-tie the trigger on and plug the saw into the wall, that blade is running until you yank the cord. If a piece of stock gets jammed or you slip, you have no way to stop the blade instantly.
Pro Tip: Do not rely on the tool’s switch. Buy a foot pedal switch (deadman switch). You plug the saw into the pedal, and the pedal into the wall. The saw only runs when your foot is on the pedal. It costs about $20 and it is non-negotiable for safety.
Phase 1: Materials and Tools
You don’t need a full cabinet shop to pull this off. Here is what you need to gather.
Materials
- 3/4-inch Plywood: Baltic Birch is preferred because it’s flat and holds screws well, but standard shop-grade pine plywood works too. Avoid MDF for the structural base as it can sag over time, though it makes a great top surface.
- Hardware:
- 1/4-20 bolts (length depends on your saw’s mounting holes).
- Washers and lock nuts.
- Wood screws (1-1/4″ and 2″).
- Velcro Strap or Heavy Zip Tie: To lock the tool trigger.
- Foot Pedal Switch: As mentioned above.
Tools Needed
- Jigsaw (essential for cutting the insert hole).
- Drill/Driver.
- Circular saw or Table saw.
- Square and Tape Measure.
- A piece of cardboard (for templating).
Phase 2: Designing the Mount
The hardest part of this build is that every brand of saw has a weird, organic shape. The motor housing bulges out, the handle is angled, and the blade guard is curved. You cannot just cut a square hole and drop it in.
Step 1: Remove the Deep Cut Guard
Most portable band saws have a metal stop or “shoe” bolted near the blade. This is usually held on by two or three hex bolts. Remove this piece.
Save those bolts! You will often use these exact threaded holes to bolt your saw to your new wooden stand. If the factory bolts are too short to go through 3/4″ plywood, take them to the hardware store and match the threads to buy longer versions (usually roughly 1/2″ longer than stock).
Step 2: Create a Cardboard Template
Don’t guess with your plywood.
- Lay a piece of stiff cardboard on your workbench.
- Stand your saw up vertically (blade pointing down) on the cardboard.
- Trace the outline of the heavy metal casting where the blade passes through.
- Mark the location of the mounting holes (where you removed the shoe).
- Cut this template out and test-fit it against the face of the saw. It should fit flat against the metal casting without hitting the blade or the wheels.
Phase 3: Building the Tabletop
The tabletop is the most critical part. It needs to be flat, and it needs to support the weight of the saw hanging underneath it.
Cutting the Table
Cut a piece of 3/4″ plywood to your desired size. I usually recommend 18″ x 18″ or 24″ x 24″. Anything smaller feels tippy; anything larger takes up too much bench space.
Transferring the Template
- Find the center of your plywood square.
- Place your cardboard template on the plywood.
- Crucial alignment: You want the blade of the saw to be roughly in the center, but pay attention to the throat depth. Orient the template so that the cutting edge of the blade faces the operator.
- Trace the shape and the bolt holes.
- Use a jigsaw to cut out the main opening where the blade and the blade guides will poke through.
Counter-Boring the Mounting Holes
You want a smooth table surface. You cannot have bolt heads sticking up.
- Drill the bolt holes for mounting the saw.
- Use a Forstner bit or a spade bit to create a countersink (recess) on the top side of the table.
- The bolt heads should sit just below the surface of the plywood.
Phase 4: The Base Structure
Now that you have a top, you need legs. The design depends on how you want to use it, but the “Box Joint” method is the strongest.
We are essentially building an open-faced box.
- The Backer Board: Cut a piece of plywood the same width as your table (e.g., 24″) and tall enough to clear the saw handle (usually about 12-14″).
- The Side Supports: These give the table rigidity so it doesn’t flex when you push stock into the blade.
- Assembly: Screw the tabletop down onto the backer and side supports.
Pro Tip for Stability: Since the motor of a portaband hangs off to one side, the weight is unbalanced. It will want to tip over. You must add a wider base plate at the bottom of the legs, or clamp the stand to your workbench during use.
Phase 5: Mounting and Squaring
This is the moment of truth.
- Flip the wooden stand upside down.
- Position the saw so the mounting holes align with the holes you drilled in the table.
- Insert your bolts (with washers) from the top side (countersunk).
- Tighten them into the saw’s casting.
The “Squaring” Problem Because we are bolting a cast metal tool to a piece of wood, it is rarely perfectly 90-degrees square to the table immediately.
- Flip the stand upright.
- Place a machinist square or a good speed square against the side of the blade and the table.
- If it’s not square: Do not bend the blade! You need to shim the mount. Loosen the mounting bolts and slip thin strips of aluminum can, paper, or shim stock between the saw casting and the plywood underside until the blade sits perfectly 90 degrees to the table.
- Tighten everything down.
Phase 6: The Blade Slot Plate (Zero Clearance)
Right now, you probably have a big, ugly gap around the blade where you jigsawed the opening. If you try to cut small parts, they will fall into that hole.
You need to make a “Zero Clearance Insert.”
- Take a thin piece of 1/8″ or 1/4″ hardboard or Masonite.
- Cut it to cover the hole in your table.
- Turn the saw on.
- Slowly raise the hardboard into the moving blade to cut a perfect kerf slot.
- Screw or glue this plate onto the tabletop. This provides support right up to the cutting edge, preventing your workpiece from tearing out or getting sucked into the machine.
Usage: Wood vs. Metal
Now that you have the stand built, how do you use it effectively?
Cutting Metal
This is where this tool shines. Whether it is Grade 8 bolts, threaded rod, or square tubing.
- Blade Speed: Run the dial at a lower speed (3 or 4 out of 6) to keep heat down.
- Lubricant: Use a wax stick (blade wax). Do not use liquid oil, as it will soak into your plywood table and ruin it.
Cutting Wood
You can use a portaband for wood, but you need to change the blade.
- Blade Selection: Standard metal blades are usually 14-18 TPI (Teeth Per Inch). This burns wood. Buy a 8-10 TPI blade for wood.
- Limitations: The throat depth is usually only about 5 inches, so you aren’t ripping plywood sheets. This is for small intricate cuts, similar to a scroll saw but more aggressive.
Frequently Asked Questions (FAQ)
Can I leave the zip-tie on the trigger permanently?
Technically yes, but it is not recommended for safety. If you leave the trigger depressed, the saw is “live” the moment you plug it in. It’s safer to use a Velcro strap that is easily removable, or strictly use a foot pedal deadman switch so the tool is never powered unless you intend it to be.
What is the best blade TPI for general purpose use?
For a “set it and forget it” blade that handles mild steel, aluminum, and the occasional piece of hard plastic or wood, a 14/18 TPI Variable Pitch blade is the gold standard. The variable tooth spacing reduces vibration and cuts cleaner across different materials.
My blade keeps popping off the wheels. How do I fix it?
This is usually a tracking issue. On most portable band saws, there is a tension lever and sometimes a tracking set screw. However, the most common culprit is worn-out rubber tires on the wheels. Inspect the rubber tires; if they are cracked or loose, replace them. Also, ensure your table mount isn’t twisting the frame of the saw.
Can I cut aluminum on this stand?
Absolutely. Aluminum cuts beautifully on a band saw. However, aluminum is “gummy.” You must use a blade wax or stick lubricant on the blade, otherwise, the aluminum chips will weld themselves into the teeth of the blade, ruining it instantly.
How do I manage dust and metal shavings?
Since these saws don’t have dust ports, it gets messy. The best DIY solution is to mount a shop vac nozzle directly under the table, right below where the blade exits the cut. This catches the debris before it falls into the motor housing. Use a magnet to clean up steel shavings from the tabletop.
Build It Once, Cut Better Forever
Building a stand for your portable band saw transforms a rough-in demolition tool into a precision fabrication instrument. It allows you to use both hands to manipulate the workpiece, which is safer and infinitely more accurate.
The total cost is usually under $30 if you have scrap wood, and it takes a Saturday afternoon to build. Just remember: stability and safety switches are key. Don’t cut corners on the mounting hardware, and always respect the blade.