There is nothing-and I mean nothing-more frustrating in the shop than a bandsaw that won’t behave. You spend good money on nice lumber, you mark your layout lines perfectly, and the second you push that wood into the blade, the cut wanders. The blade dances back and forth. The machine hums with an angry vibration.
If your bandsaw blade is wobbling, you aren’t just getting bad cuts; you’re fighting a safety hazard. A blade that isn’t tracking true is prone to snapping or kicking back stock.
I’ve spent the better part of three decades standing in front of bandsaws, from massive 24-inch industrial resaw beasts to the standard 14-inch cast iron workhorses found in most garages. I’ve seen every wobble, shimmy, and shake imaginable. The good news? It’s almost always fixable without calling a mechanic.
In this guide, we are going to walk through the entire system-from the tires to the tensioner-to diagnose exactly why your blade is wobbling and how to dial it in so it runs smooth as glass.
Understanding the “Wobble”: Diagnosis First
Before we start turning wrenches, we need to understand what the saw is telling us. “Wobble” is a catch-all term that woodworkers use, but it usually refers to one of three distinct problems. Identifying which one you have will save you an hour of tinkering.
1. Blade Flutter
This looks like the blade is vibrating side-to-side violently in the unsupported space between the upper guides and the table. It usually happens when the saw is running free (not cutting).
- The Cause: Usually low tension.
2. Rhythmic Ticking or “Thumping”
Does the blade jump forward and back, or side to side, in a rhythmic pattern? Tick… tick… tick…
- The Cause: This is almost always a bad weld on the blade itself, a kink in the steel, or a flat spot on your tires.
3. Wandering (Drift)
The blade looks steady, but the moment you try to cut a straight line, the blade twists or “wobbles” off your line.
- The Cause: Guide bearing misalignment, dull teeth, or incorrect tracking.
We are going to tackle all of these, starting with the most common culprit: the blade itself.
Step 1: Inspect the Blade and Weld
I cannot tell you how many times I’ve torn a bandsaw apart looking for a mechanical issue, only to find out the $30 blade I just bought was garbage.
A bandsaw blade is a strip of steel welded into a loop. If that weld is not perfectly ground and aligned, the blade will have a “kink” in it. Every time that kink passes through the guides, it slaps them. This creates a wobble that you cannot tune out with machine adjustments.
The “Back of the Blade” Test
Unplug your saw. Open the upper and lower doors. Rotate the upper wheel by hand and watch the back edge of the blade (the spine) as it passes through the guides.
- Does it move smoothly?
- Or does it “hop” forward or backward every time the weld seam passes?
If you see a hop, check the sides of the blade at the weld. If the grinding was sloppy, the blade might be thicker at the weld than anywhere else.
The Fix: If it’s a bad weld, you have two options.
- Stone it: If there is a burr or a slight misalignment, you can sometimes smooth it out with a diamond honing stone or a fine file. Be very gentle. You are just removing the burr, not weakening the joint.
- Trash it: If the blade is kinked (bent) at the weld, toss it. No amount of guide adjustment will fix a bent piece of steel. Buy a quality blade from a reputable specialized manufacturer, not just a generic big-box store replacement.
Step 2: Check Your Tires and Wheels
If your blade is straight but the saw is still vibrating like an old washing machine, look at the wheels. Bandsaw wheels are crowned (slightly rounded) and covered with a rubber or urethane tire. This tire provides the grip and the crown that forces the blade to track in the center.
Cleaning the Tires
In a busy shop, sawdust and pitch get compressed onto the tires. I’ve seen “lumps” of pine pitch stuck to a tire that caused a massive wobble.
- The Fix: Take a stiff brush (nylon or brass, not steel wire if you can help it) and scrub the tires while spinning the wheel by hand. If there is stubborn pitch, a little mineral spirits on a rag works wonders to dissolve it.
Inspecting for Flat Spots
If you leave your bandsaw under high tension for weeks without using it, the tires can develop flat spots where the blade was digging in.
- The Fix: Run the saw for 10-15 minutes without cutting. sometimes the heat and motion will work the rubber back into shape. If not, and you feel a rhythmic thump-thump-thump, it’s time to replace the tires. I recommend upgrading to bright orange urethane tires-they don’t require glue and they last forever.
Step 3: Dialing in the Tension
Most woodworkers are scared of tension. They think if they crank it too high, the blade will snap like a rubber band. The reality is that most wobble issues come from under-tensioning.
If a blade is loose, it cannot stand up to the pressure of the wood. It will flutter, twist, and wander.
Ignore the Gauge
Your bandsaw likely has a built-in tension scale on the back. Ignore it. Those springs fatigue over time, and they are rarely accurate. A “1/2 inch” setting on the scale is usually nowhere near enough tension for a modern 1/2 inch blade.
The “Flutter Method”
This is the gold standard for setting tension without expensive gauges.
- Raise your upper blade guides all the way up.
- Close the covers and turn the saw on.
- While the saw is running, slowly decrease the tension. Watch the blade. You will see it start to vibrate or “flutter” violently side-to-side.
- Now, slowly increase the tension just until that flutter disappears and the blade runs straight.
- Once the flutter is gone, give the tension wheel one more quarter-turn or half-turn for good measure.
This is your sweet spot. The blade is tight enough to run true, but not over-stressed.
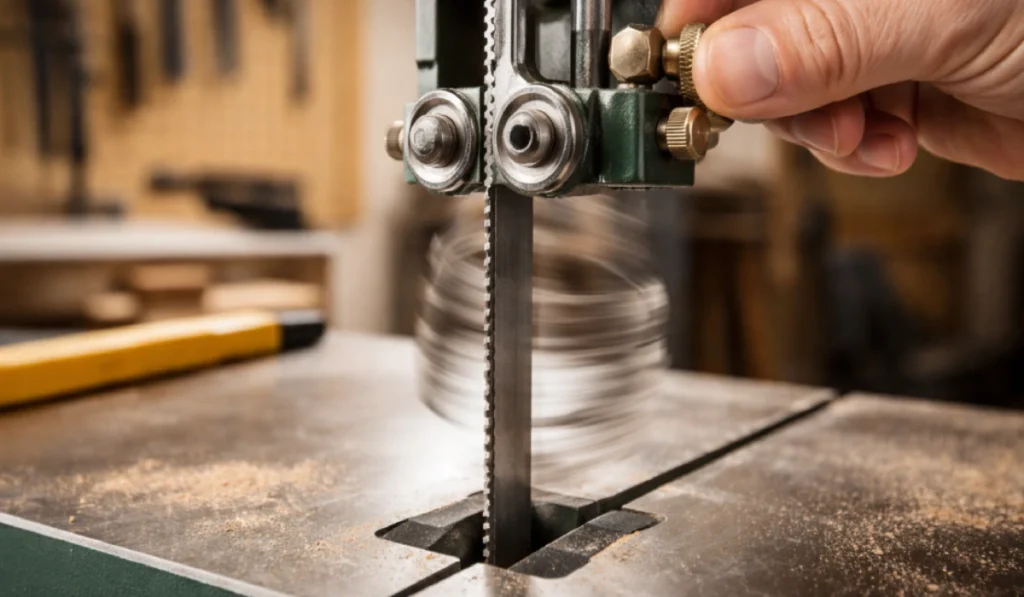
Step 4: Tracking and Coplanarity
Now that the blade is tight, where is it sitting on the wheel?
For a standard crowned wheel, you generally want the deepest part of the gullet (the valley between the teeth) to be in the center of the tire.
- If you center the body of the blade, the teeth might dig into the tire, ruining it.
- If you track it too far forward, it will wobble because it’s falling off the crown.
Adjust the tracking knob on the back of the upper wheel housing. Spin the wheel by hand. Watch the blade ride. It should find its place and stay there. If it wanders back and forth constantly without settling, your wheels might not be coplanar.
Checking Coplanarity
Coplanar simply means the top wheel and bottom wheel are lined up parallel to each other.
- Take a long straightedge (a 4-foot level works well).
- Place it against the rims of the top and bottom wheels.
- The straightedge should touch four points: the top and bottom of the upper wheel, and the top and bottom of the lower wheel.
If the top wheel is tilted way back or twisted relative to the bottom one, the blade will constantly fight to center itself, causing a wobble. You can usually adjust the lower wheel hub with shims, or adjust the upper wheel’s tilt mechanism to bring them into alignment.
Step 5: The Guides (The Critical Adjustment)
If you have done everything above-blade is good, tires are clean, tension is perfect, tracking is centered-and you still have wobble, your guides are the problem.
The guides (whether they are ball bearings or ceramic “cool blocks”) are there to prevent the blade from twisting during the cut. They are not there to guide the blade while it is idling.
The Sequence Matters
Do not adjust guides until you have set tension and tracking. If you change tracking later, you have to redo the guides.
1. The Thrust Bearing (The Backstop)
This is the bearing behind the blade. It takes the pressure when you push wood into the saw.
- The Setting: It should not touch the blade when the saw is idling. There should be a gap about the thickness of a piece of paper or a dollar bill.
- Why: If it touches constantly, the bearing will spin at 3000 RPM, overheat, and scream. It should only spin when you are cutting.
2. The Side Guides
These keep the blade from twisting left or right.
- Forward/Back Position: The front edge of the side guides should sit just behind the gullet of the teeth. If they are too far forward, the teeth will hit the metal guides, ruining the set of your teeth instantly.
- Side-to-Side Position: You want these close, but not pinching.
- The Dollar Bill Trick: I fold a dollar bill around the blade. I push the guides in until they pinch the dollar bill lightly against the blade. Then I tighten the guides and pull the bill out. This leaves a perfect .003″ to .004″ gap.
Repeat this for both the upper and lower guide assemblies. Many people forget the lower guides because they are hard to reach under the table. If you ignore the lower guides, the blade will wobble beneath the table, ruining your cut accuracy.
Step 6: Table Alignment and Throat Plate
This is a sneaky one. Sometimes the blade isn’t wobbling; the table is just misaligned, creating the illusion of a wobble or drift.
Check your throat plate (the little insert in the table surrounding the blade).
- Is it flush with the table?
- Is it worn out with a wide gap?
If a small offcut of wood gets jammed between the blade and the throat plate, it will deflect the blade momentarily, causing a wobble. Keep this area clean. If your throat plate is chewed up, make a “zero clearance” insert out of a piece of thin plywood or MDF. This supports the wood fibers right up to the cut and stabilizes the blade.
Summary: The “No-Wobble” Checklist
If you are standing in your shop right now looking at your saw, here is your quick-hit checklist to kill the wobble:
- De-tension and spin the wheels. Scrub the tires clean of sawdust pitch.
- Inspect the blade weld. If it bumps or kinks, file it or trash it.
- Apply Tension. Use the flutter method to find the true tension, ignoring the scale.
- Track it. Center the gullets on the tire crown.
- Set Thrust Bearings. A dollar bill’s width behind the blade.
- Set Side Guides. A dollar bill’s width from the sides, behind the gullets.
- Check Lower Guides. Don’t be lazy; get under the table and set those too.
Conclusion
A bandsaw is a relatively simple machine-it’s just two wheels and a loop of steel. But because it relies on tension and balance, it is sensitive to setup. A wobbling blade isn’t just an annoyance; it’s a sign that the machine is fighting itself.
Taking 20 minutes to run through this tune-up process will change your woodworking experience. Instead of fighting the wood and sanding out ripple marks later, you’ll be slicing veneers and cutting curves with confidence. The sound of a perfectly tuned bandsaw isn’t a rattle or a roar; it’s a quiet, consistent hum.
Frequently Asked Questions (FAQ)
1. Why does my bandsaw blade wobble when I back out of a cut? When you back out of a curved cut, you are likely pulling the blade off the tracking crown. The friction of the wood grabs the teeth and pulls the blade forward off the wheels. To fix this, always try to cut your way out (make relief cuts) or turn the saw off and let it stop completely before backing the wood out carefully.
2. Can a dull blade cause wobble? Absolutely. If the teeth on one side of the blade are duller than the other (which happens if you hit a nail or a hard knot), the sharp side will cut faster, pulling the blade in that direction. This forces the blade to twist and wobble as it fights the guides. If you’ve tuned the machine and it still cuts crooked, try a new blade.
3. How often should I replace my bandsaw tires? There is no set time, but you should inspect them annually. If they are cracked, brittle, or have deep grooves where the blade rides, replace them. Urethane tires generally last much longer than standard rubber ones and are worth the upgrade.
4. Why does my blade vibrate only when I cut thick wood? This is usually a “beam strength” issue. If you are resawing thick stock (6 inches or more), a thin blade (like 1/4″) isn’t stiff enough to handle the pressure. It will bow and flutter inside the wood. For thick wood, switch to a wider blade (1/2″ or 3/4″) and ensure your tension is high enough to keep the blade rigid.
5. Should I de-tension my bandsaw after every use? Yes, I highly recommend it. Leaving the blade under full tension compresses the tires and stresses the wheel bearings and the spring. Over time, this creates flat spots on the tires that cause permanent vibration. Many modern saws have a “quick release” lever for this exact reason. Use it!